Quick Start Guide
Curious how 2ConnectMe looks on a real website? Open our live demo and try it yourself. See voice chat, video chat, screen sharing, recording, and live customer screen view in action — instantly, with no signup.
Setup Your Profile
Define your public identity and claim chat room.
Configure your public profile and username parameter
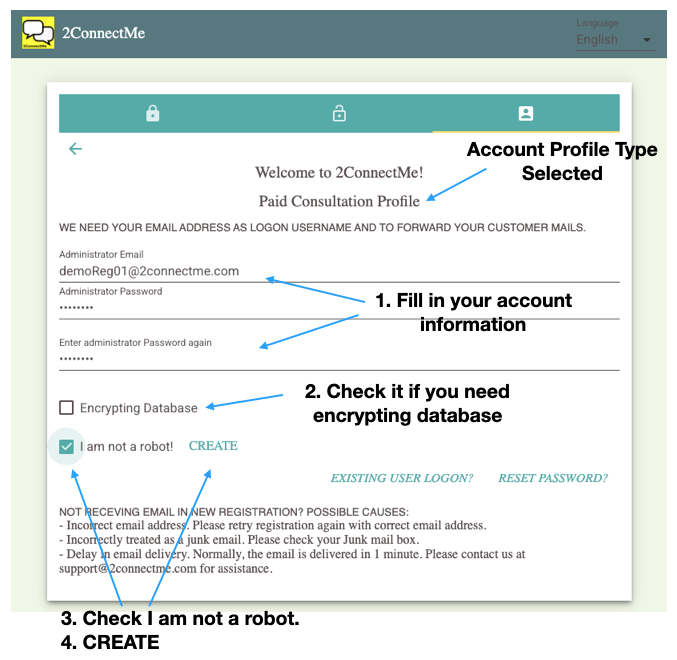
- Click “Setup Profile” button above to join 2ConnectMe.
- You will go through the screens below resemble the visual layout previews below:

Select business profile
Three types of Forever Free Plan are avaialbe.
- Paid Consultation Profile: It is for business with a team of staff to provide online services. While it comes with the most flexibile settings and configurations to fit any business, the initial default settings are well setup for Solo business founder to start services in 15 minutes.
- Therapist US HIPAA: It transforms a therapist website into a clinic with paid video sessions in compliance with United States HIPAA
- Therapist – Hong Kong Personal Data Privacy Ordinace (PDPO): It transforms a therapist website into a clinic with paid video sessions in compliance with Hong Kong Personal Data Privacy Ordinance
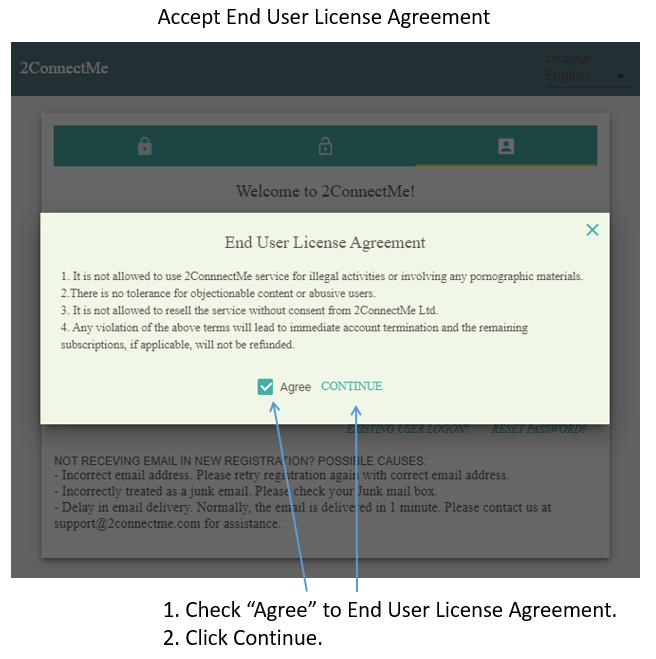
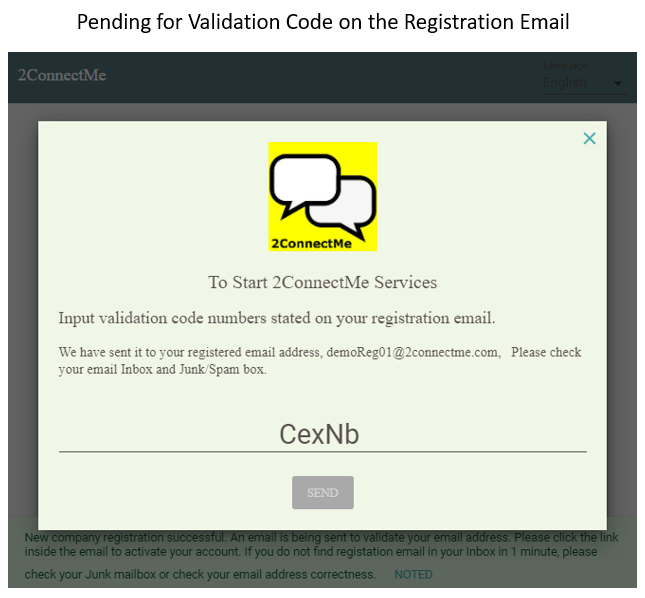
Registered email address verification
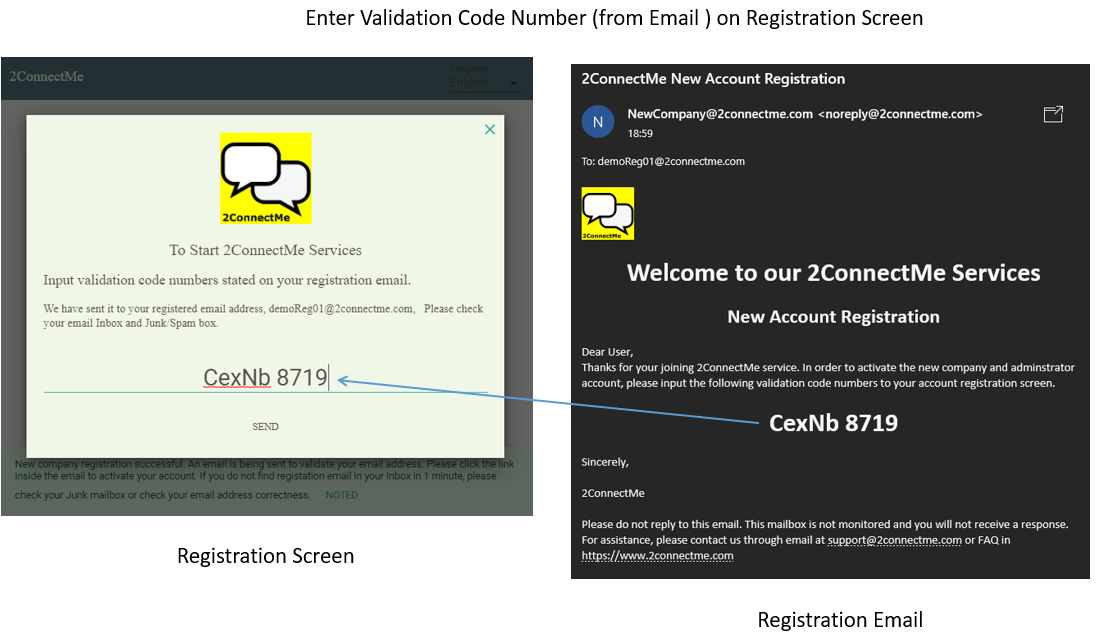
An validation code number is sent to your registered email address. Just enter those numbers on the registration screen and it will divert you to agent desktop screen. If you do not find the registration email in your Inbox in 1 minute, please check your Junk/Spam mailbox. Sometimes, email systems wrongly treat it as a Junk/Spam mail.
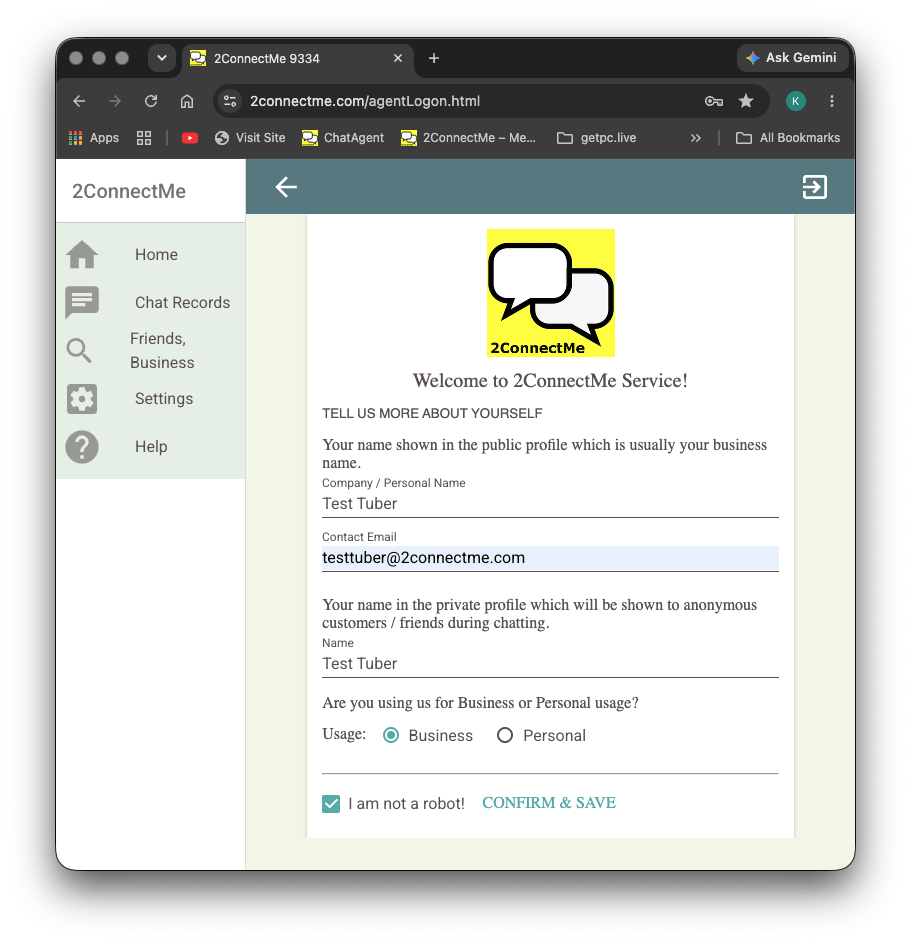
Setup Profile at First Logon
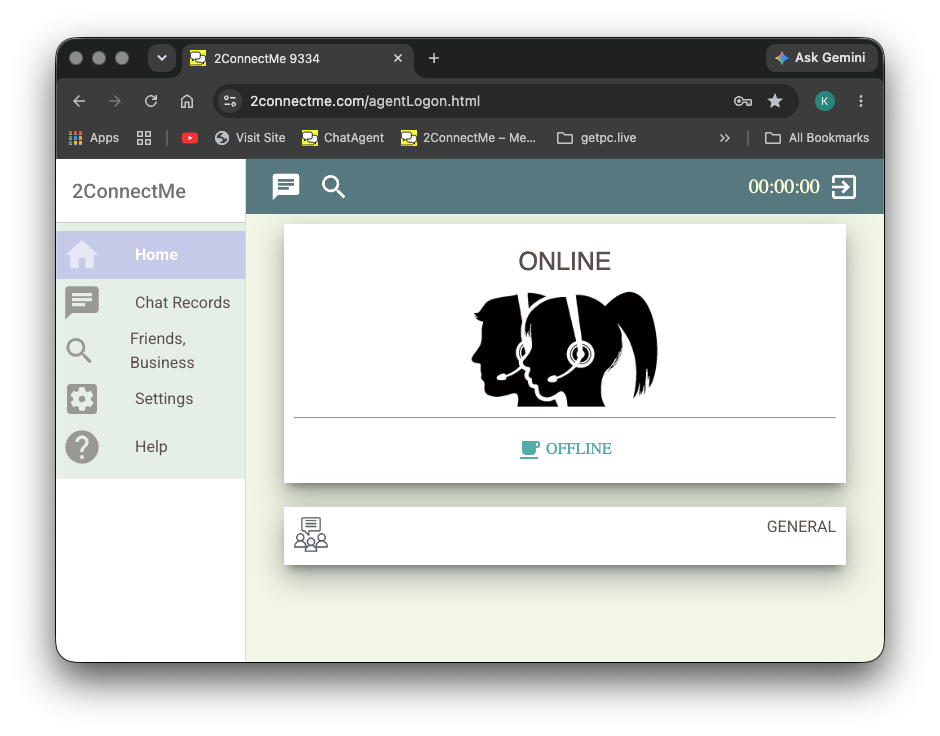
After entering the correct validation code numbers on the registration screen, you will then logon to 2ConnectMe Admin Console. For the first time logon, initial setting wizard helps you setup the service with minimal mandatory settings. The Initial settings can be changed at any time later.
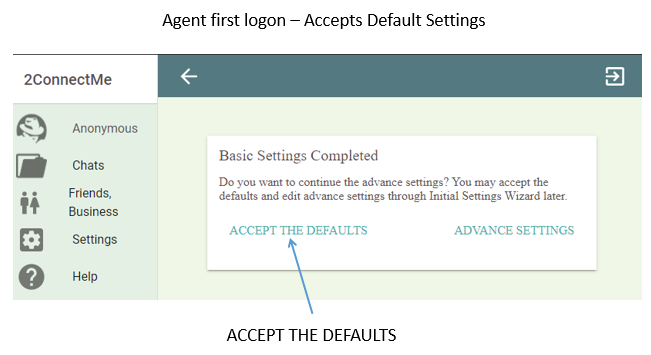
Accept Default Settings
Then you may either Accept default settings, which is recommended for new users, or continue the detail system settings as screen shown below. Please take note that the “WhatsApp” setting is NOT activated by default. In case you would like to have “WhatsApp” agent settings, please continue “ADVANED SETTINGS” or “INITIAL SETTINGS WIZARD” on the next section of this document.
Test Your First Video Chat
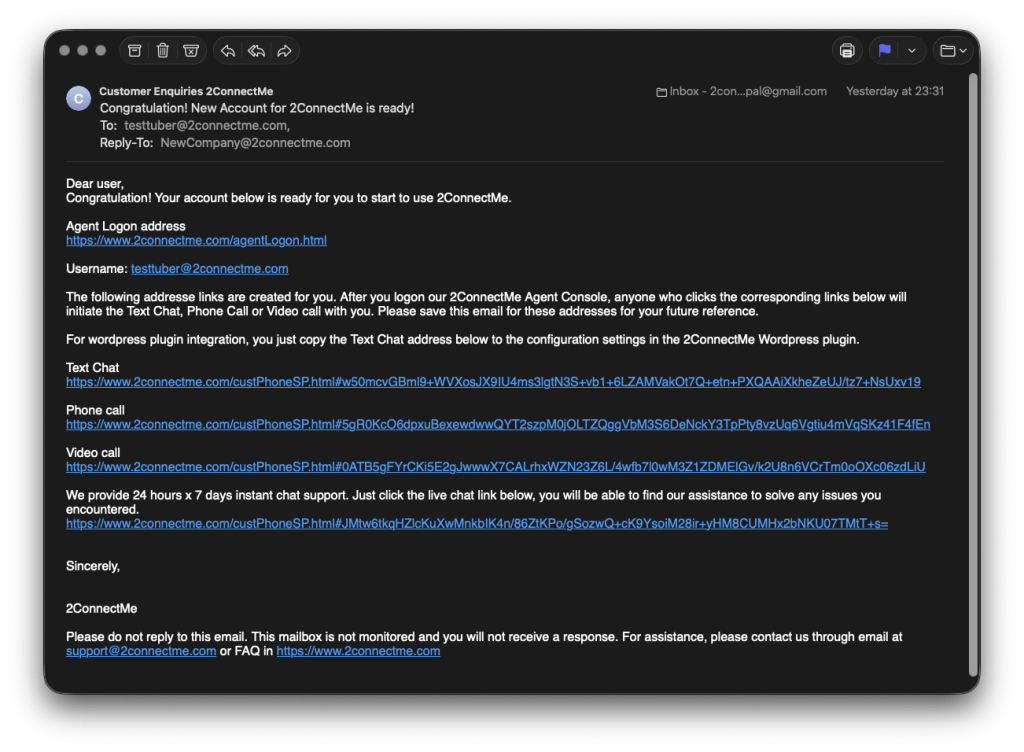
Test a normal live video link prior to setup pricing scheme. The links on the registration email are the LINKS you could put on your website, social media bio, description or even pinned comment.
Launch chat room Url link test
- Check your administrative mailbox. We have automatically sent a secure chat room links to your registered email address.
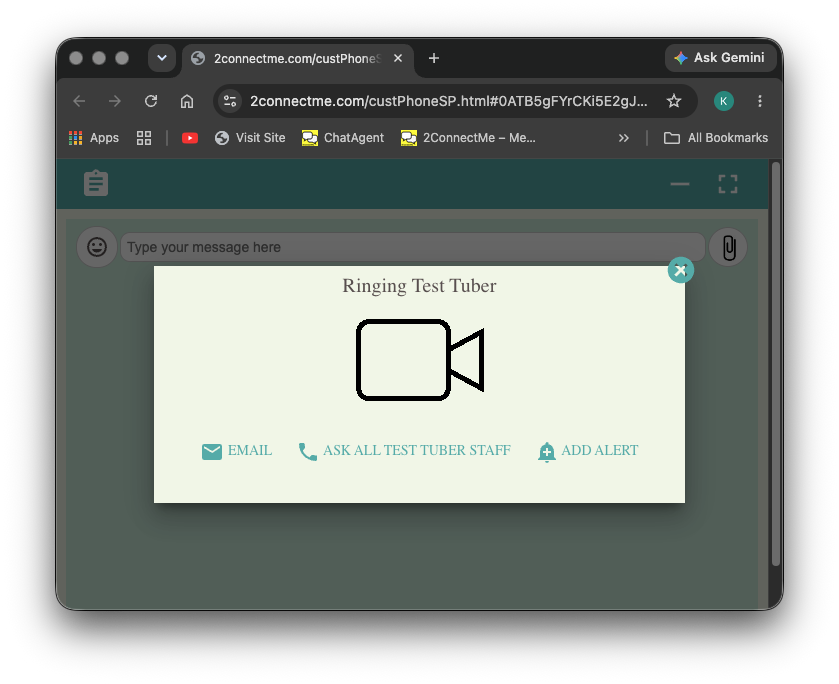
- Click that email invitation link for video chat to open a safe, isolated client chat window right inside your standard browser (no app downloads required).
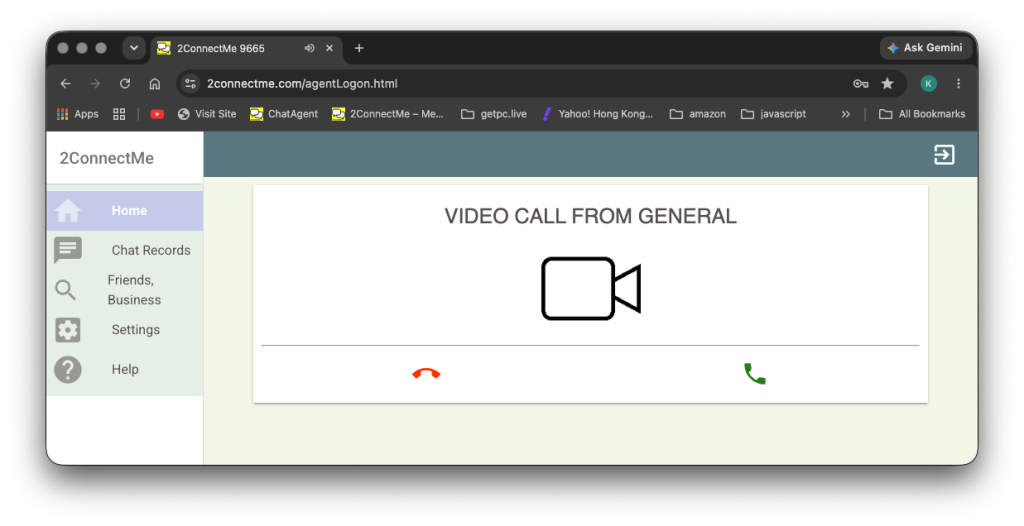
- Your agent answers an incoming video chat.
Advance Settings
Setup Service Prices
Setup Your Service Price
Set your service price with live per-minute pricing structure.
Configure Pricing
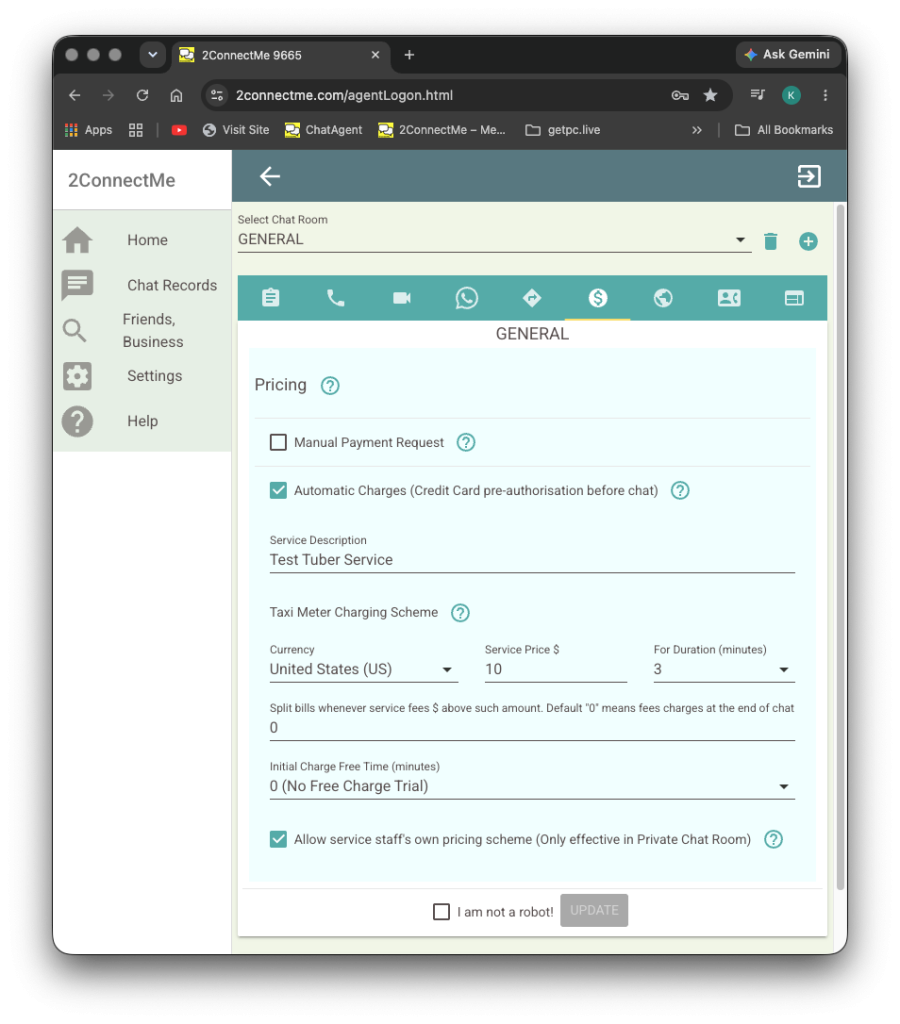
- Go to Settings -> Public Anonymous ChatRoom -> “Pricing Tab”.
- Enable “Automatic Charges” with service details and taxi meter charging scheme. Click “Update”.
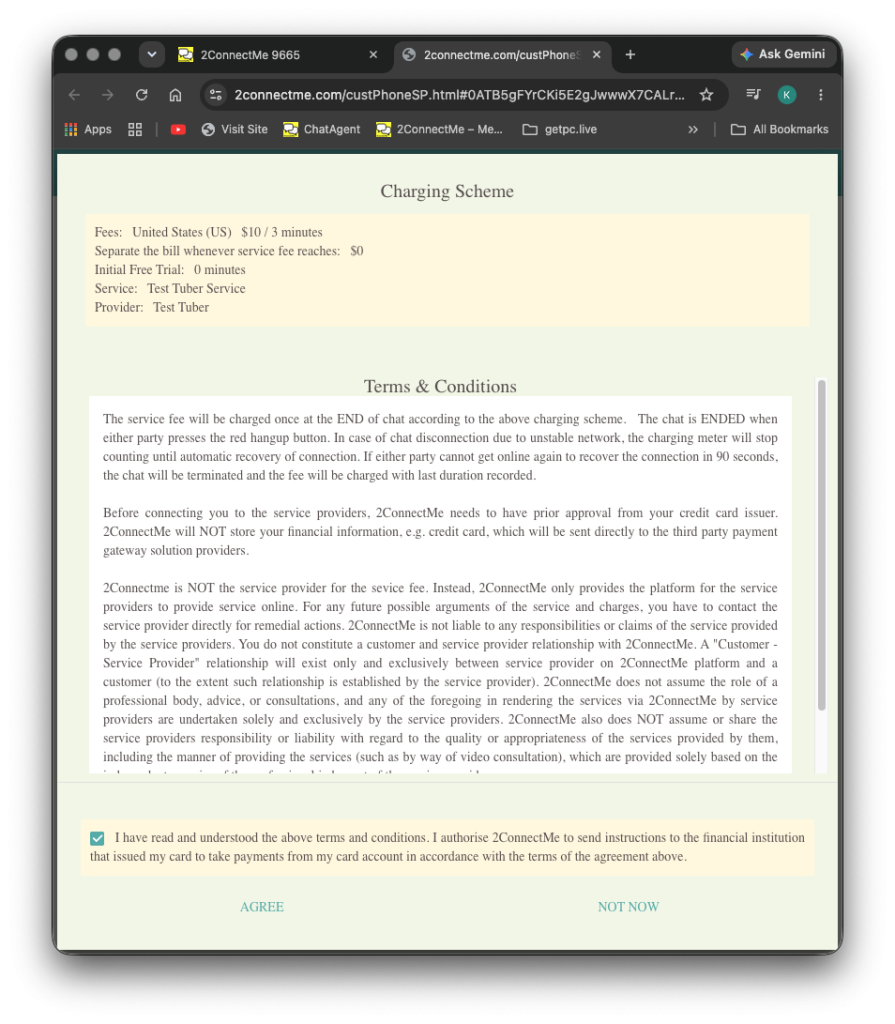
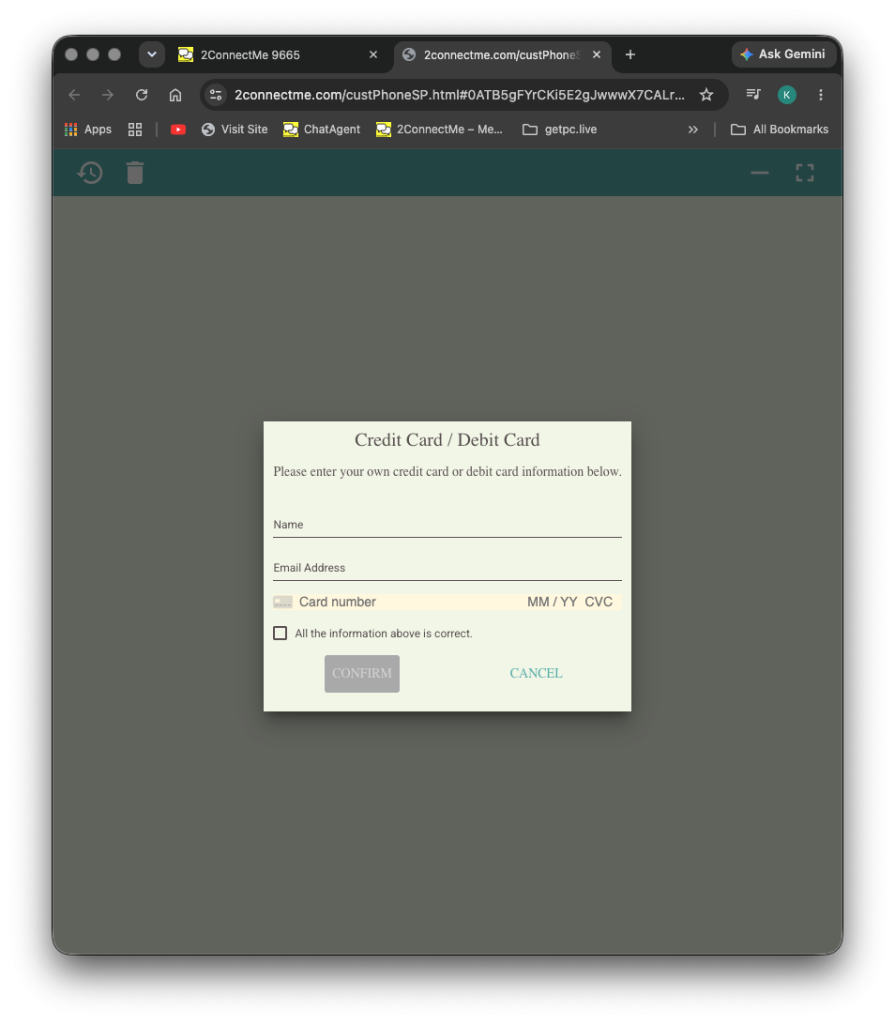
- Click the same test video chat link above and it will prompt client to have pre-authorisation credit card prior to connecting to service staff.
Chat with Ad-Hoc Pricing
Standard room rates on chat room settings above don’t fit every client. Whether you need to charge a premium for an urgent issue or offer a discount to a friend, you can completely override your baseline fees on the fly. Simply customize your ad-hoc service pricing directly on the meeting request link on the “Friends / Business” and sending it out.
Ad-hoc pricing configuration
- Go to the “Friends / Business” -> Input the receipent email address
- Enter the new service price on the form and click SEND
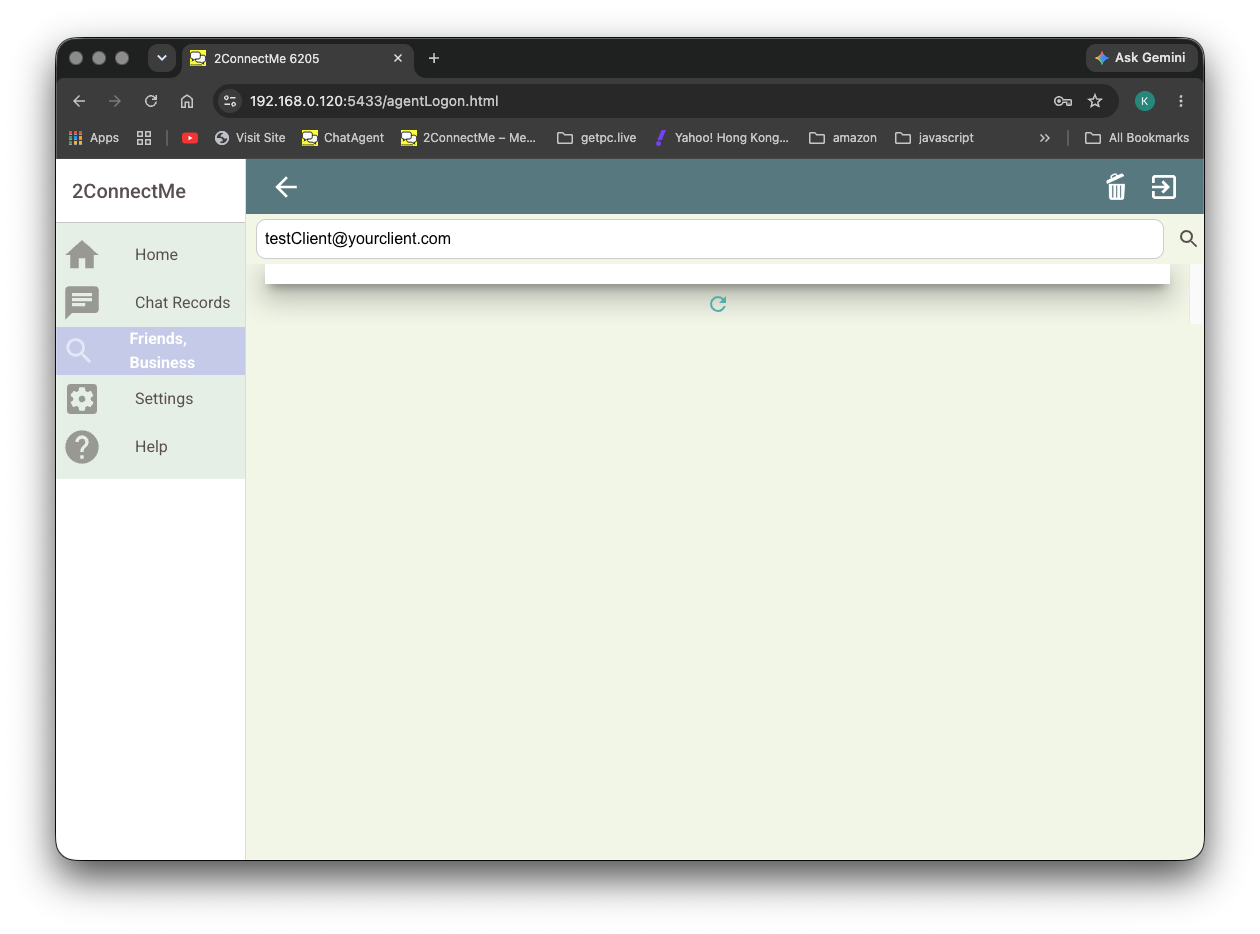
Invitation Form
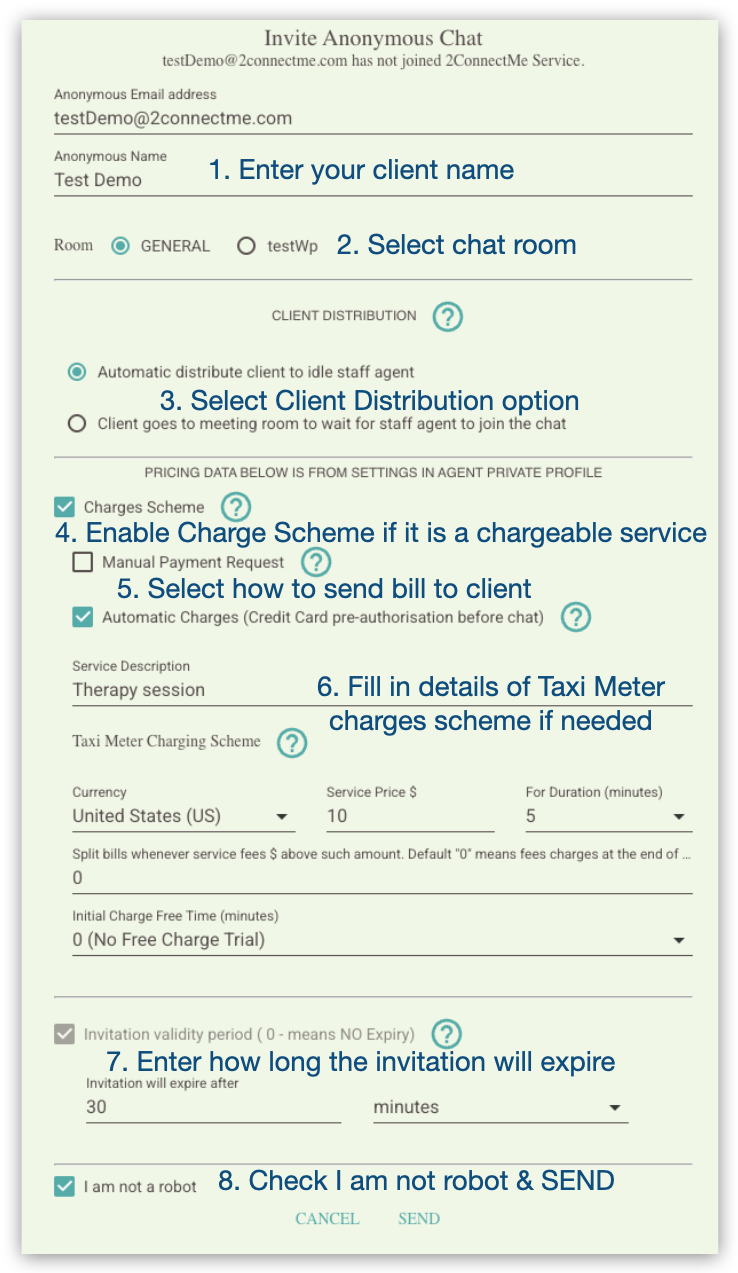
For the client distribution options on step 3, please refer here
For the pricing scheme on step 4, 5 & 6, please refer here.
For the invitation validation period on step 7, it specifies how long the invitation is valid from the time of invitation sent.
Invitation Email Sent
In case of incorrect unreachable email address, 2ConnectMe cannot know it in advance. Therefore, when clents do not receive such invitation in 1 minute, you have to ask clients to check their junk mailbox or the correctness of the email address.
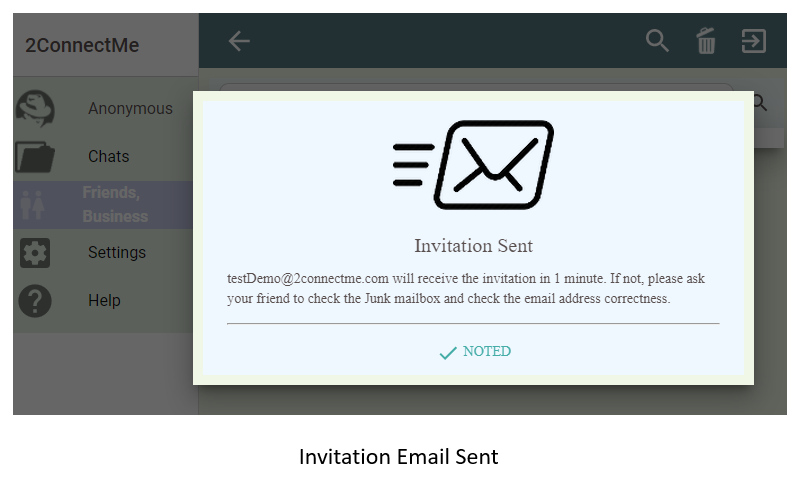
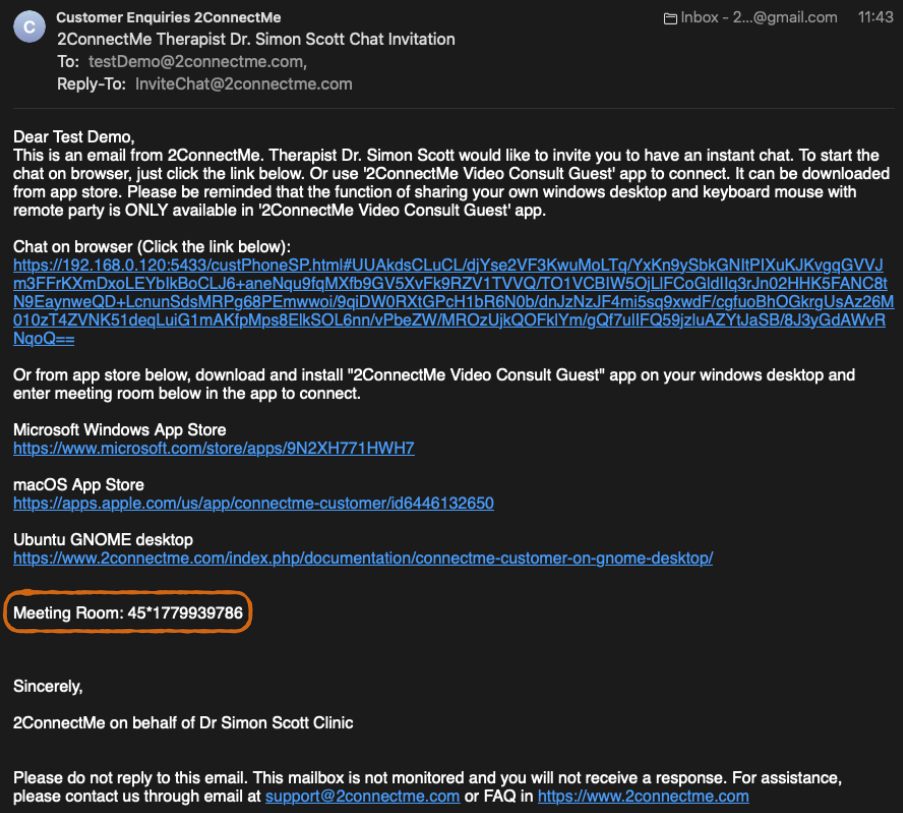
Client will receive above email with Url link for going to contact form of service staff through a normal browser.
Or download the client phone app, “2ConnectMe Video Consult Guest”, with meeting room ID to go to the contact form of the service staff.
Link Your Stripe Account with 2ConnectMe
Protect your income. Authorize your secure stripe account integration with a single click. Your fans payment will instantly be deposited in real time, i.e. your 90% share directly into your stripe account when a call terminates.
Otherwise, we will pay you on a weekly basis, i.e. within 7 business days.
Connect Your Stripe
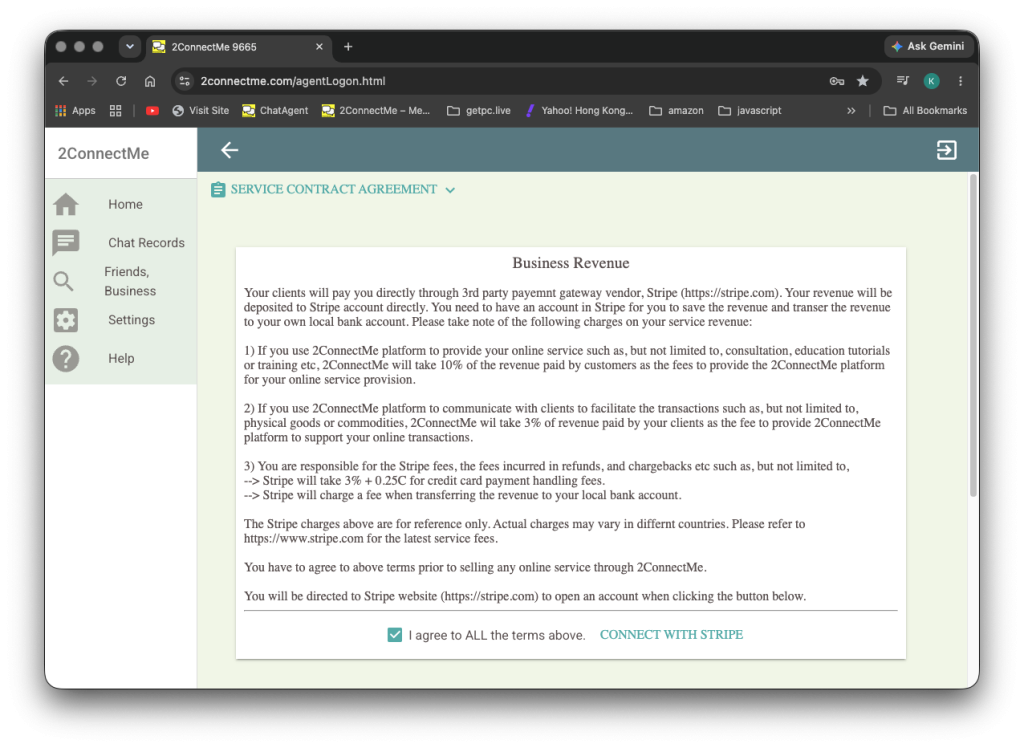
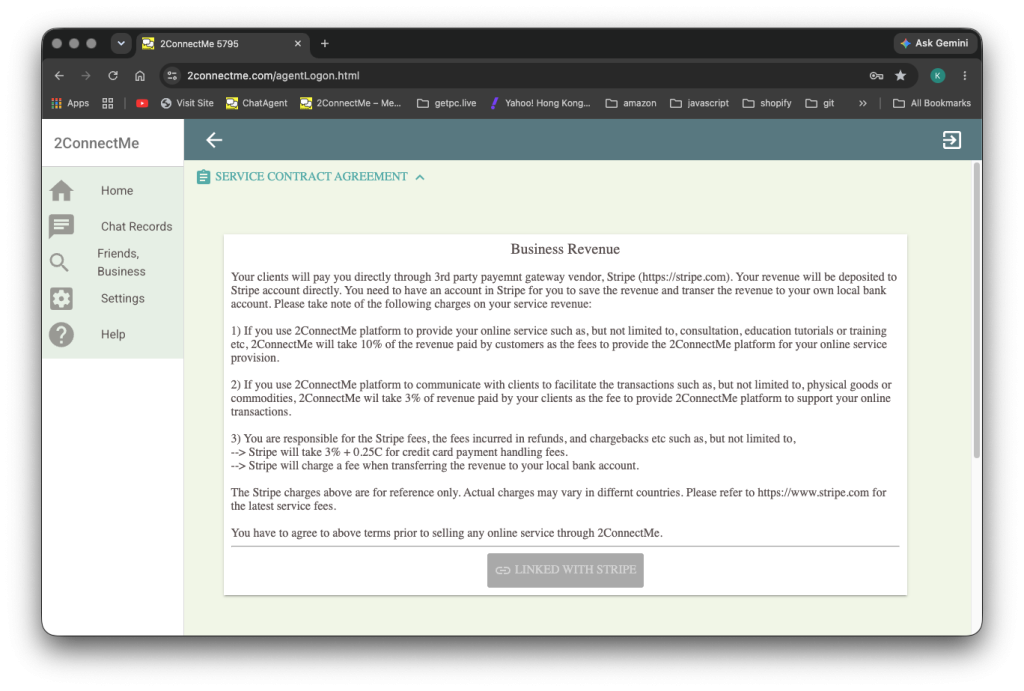
- Go To Settings -> Business Revenue
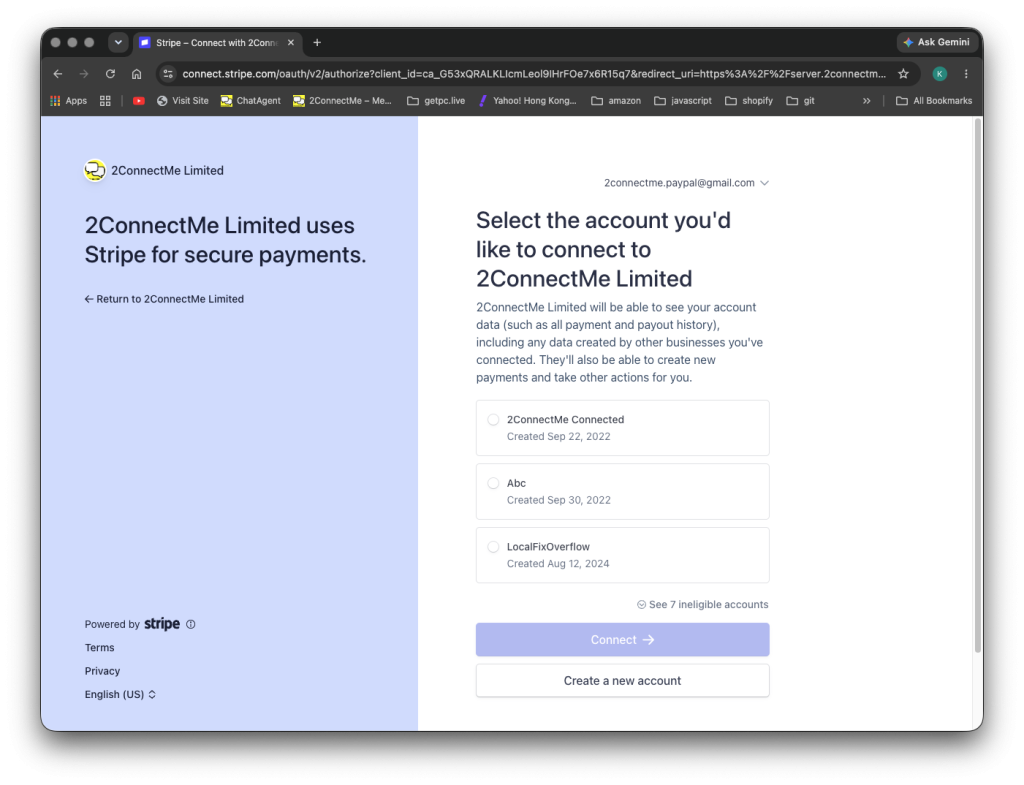
- Review and agree to the terms and Click “CONNECT WITH STRIPE”
- Select any of your stripe account, if you have one, for your future receiving fans payment. Or create a new stripe account directly here.
Your Revenue Summary
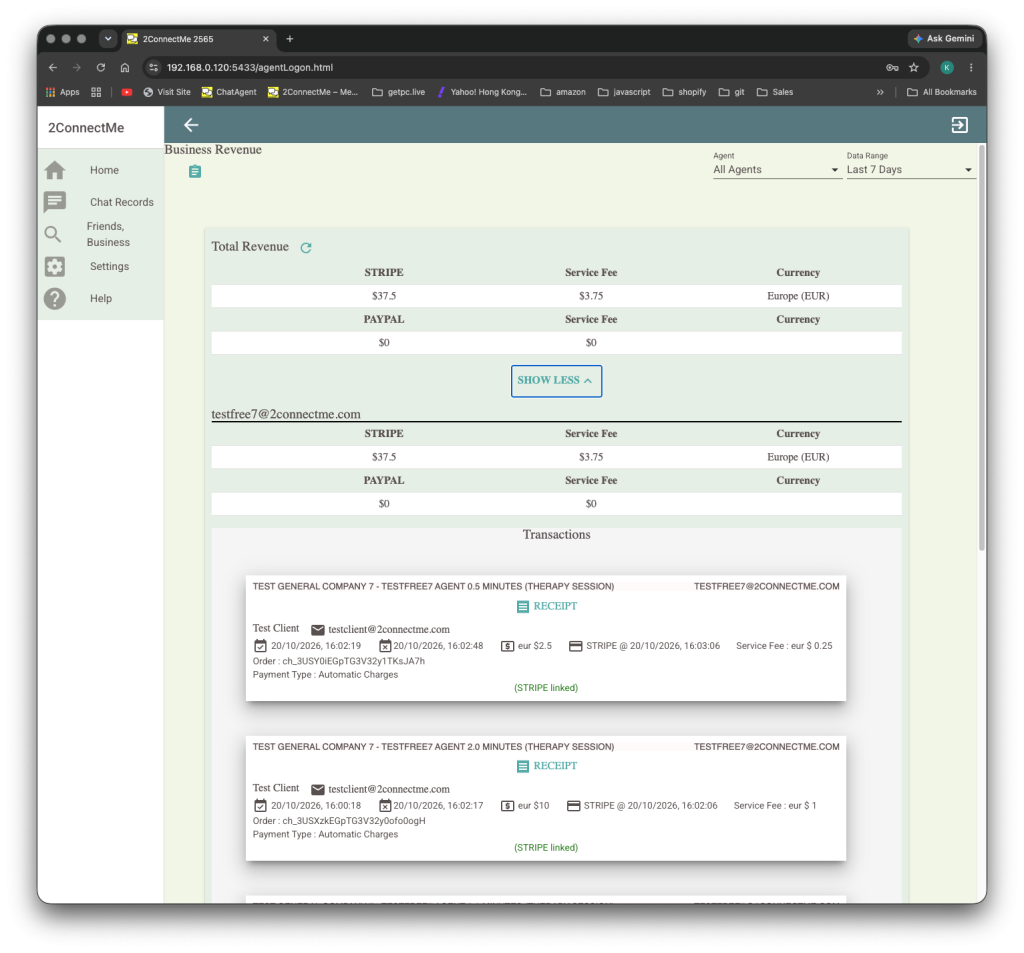
Track real-time processing balances, statement transcripts, and clear payouts.
Open Statements
Go to Settings -> Business Revenue
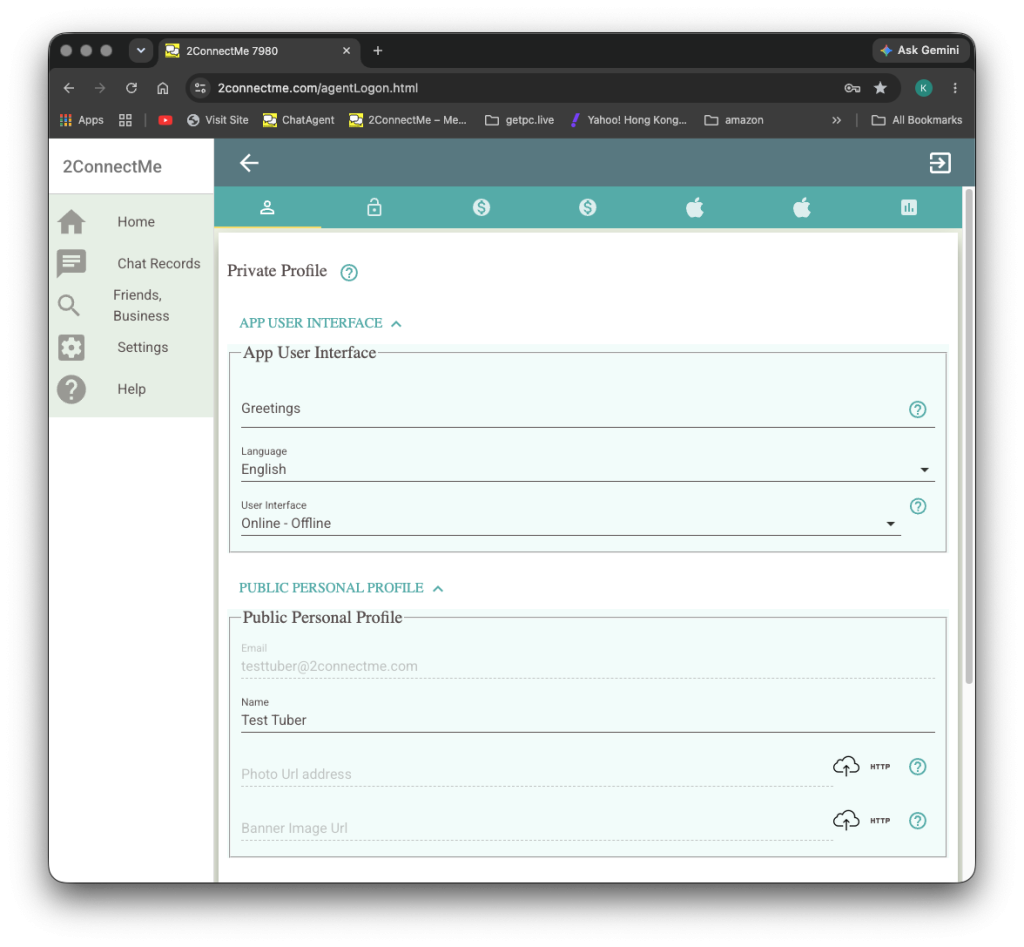
Update your public profile photo and information
Go to Settings -> Private Profile
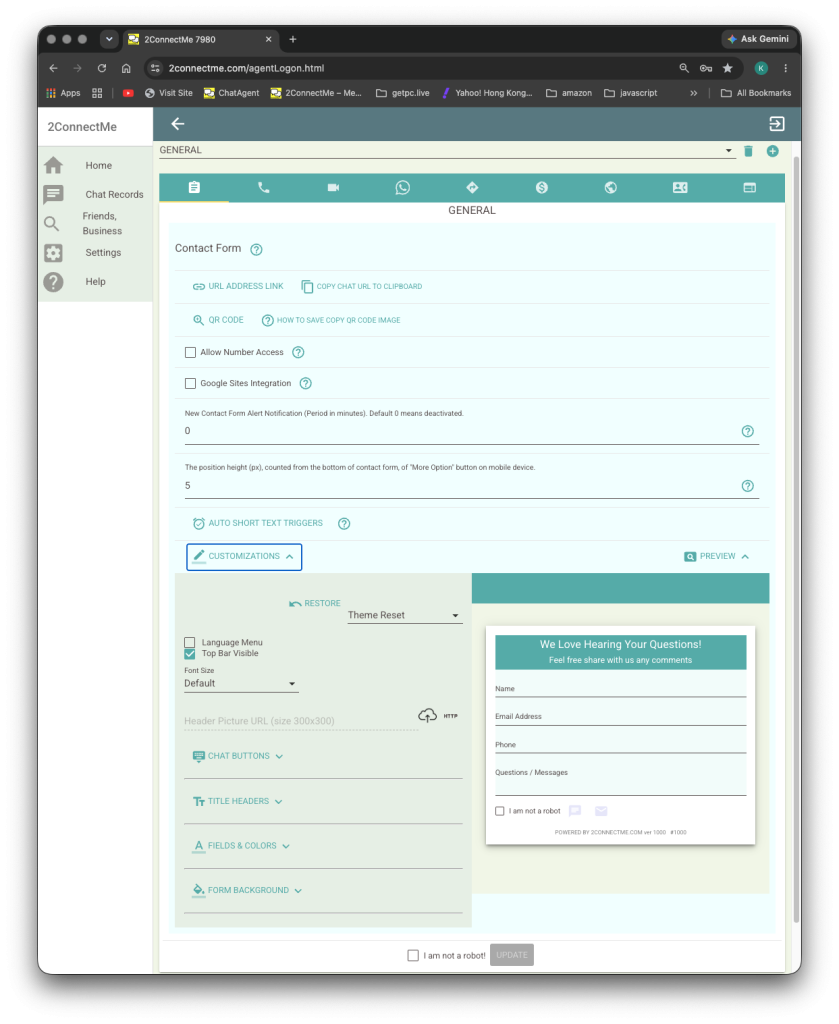
Update color and layout of contact form
- Go to Settings -> Public Anonymous ChatRoom.
- Switch to the Contact Form Layout tab -> Customizatons / Preview
- Drag, drop, or toggle the required fields (like names, emails, or pre-chat descriptions) that fans must complete before entering your room.
- Hit Save to instantly apply the new design to your private chat room link.
Integrations
Facebook / YouTube / Social Media
Integration – Facebook / YouTube / Any social media
you can just paste the chat room address link to your social media, e.g. facebook, youtube, or your own meeting request for online meeting. Immediately Working. Yes, it is like a magic!
Facebook / YouTube / Social Media
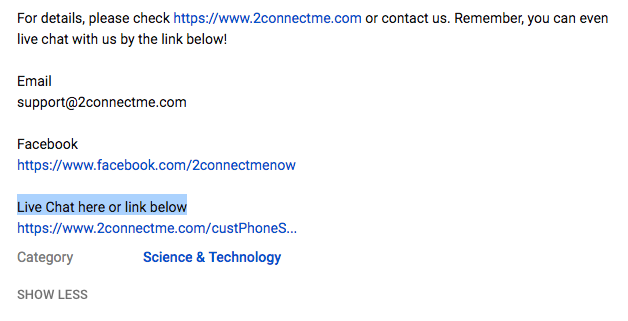
For example, you may check the youtube video here which we put our live chat URL at the end of video descriptions as a public contact channel.
WordPress
WordPress
- Install our WordPress Plugin – “Business Chat Room“.
- Activate the plugin.
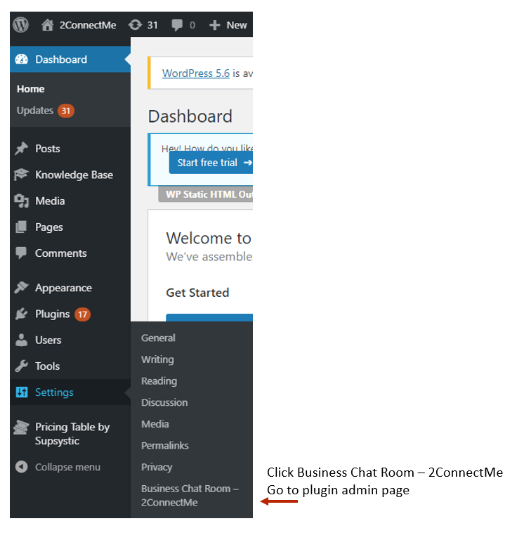
- Go to Settings -> Business Chat Room – 2ConnectMe
In the settings, there is a simulated website to demonstrate how the 2ConnectMe sticky chat button appears to your visitors. The button reflects the settings on the plugin. Change any option and click Save Changes — then reload such page to see the updated preview.
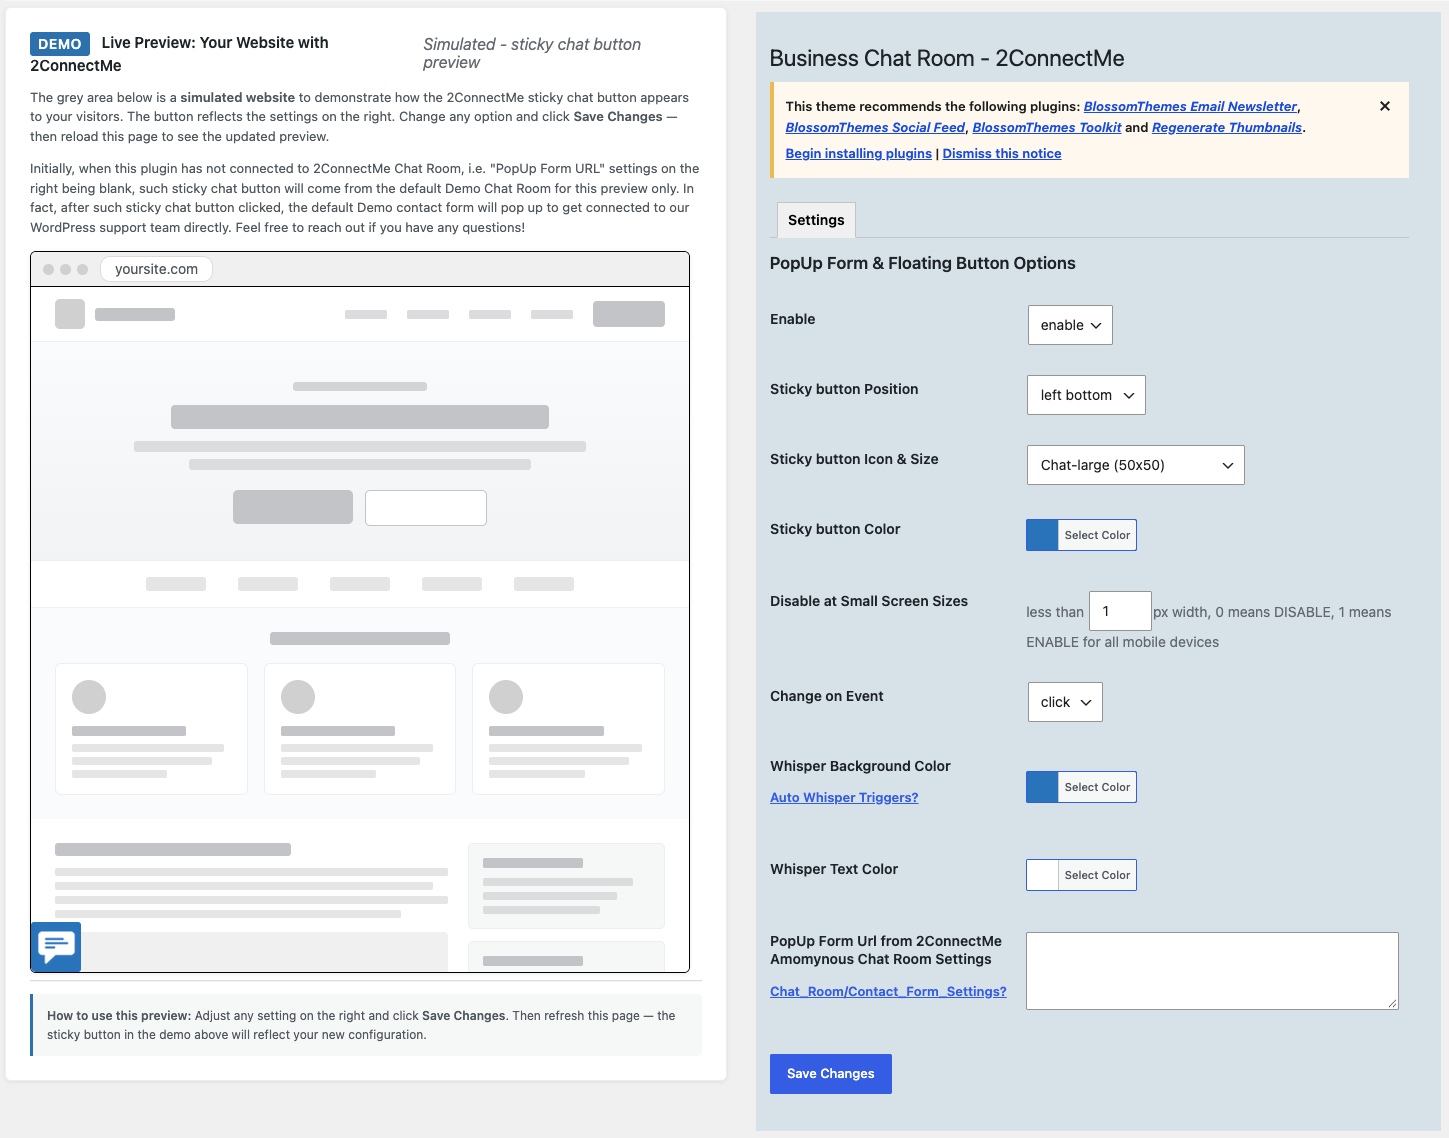
The local WordPress website plugin is mainly for setting the colour and layout of the Floating Button and Whisper text shown on the website. The most important settings is the chat room URL which could be found in the email received for the New Account Details.
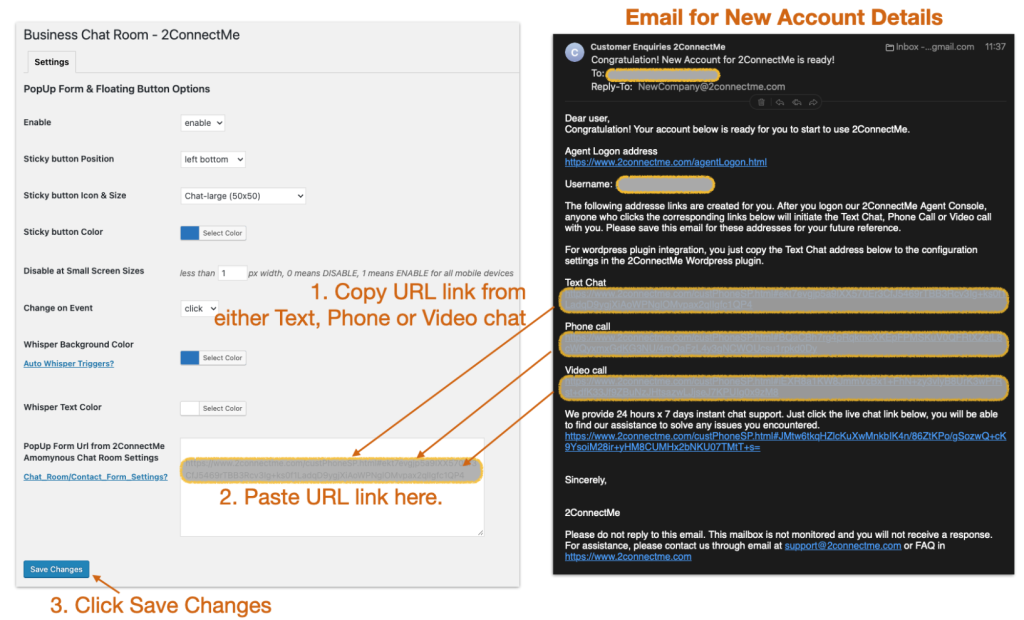
The details of Contact Form layout and how the customer chats are distributed to agents are configured through the Public Chat Room Admin of 2ConnectMe Admin console, NOT in the WordPress Plugin Admin.
Details of sticky button / pop up contact form on WordPress document here.
HTML web page
Any HTML webpage
Click to call button on webpage
Just copy the chat room URL in the email above and put under any html button with Click action. The chat room URLs can also be found in the chat room settings here.
Setup sticky chat button on web page
Go to Settings -> Anonymous Chat Room -> “GENERAL” (initial default chat room) -> HTML web page integration tab
- Configure the colors and position of of such sticky chat button.
- Click “COPY HTML TO CLIPBOARD”.
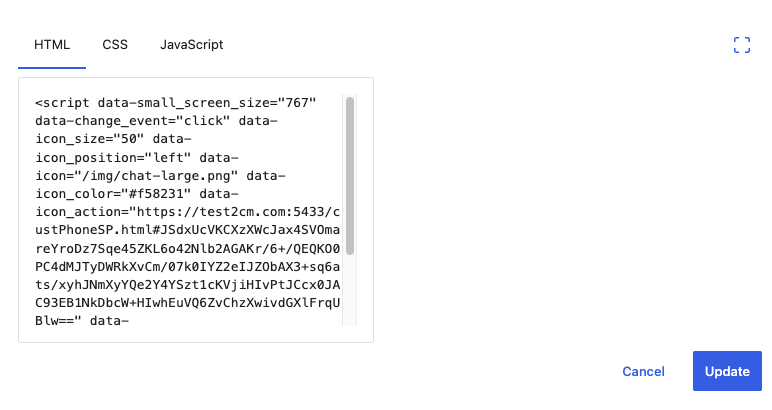
- Paste such HTML codes inside <body> tag of any normal webpages.
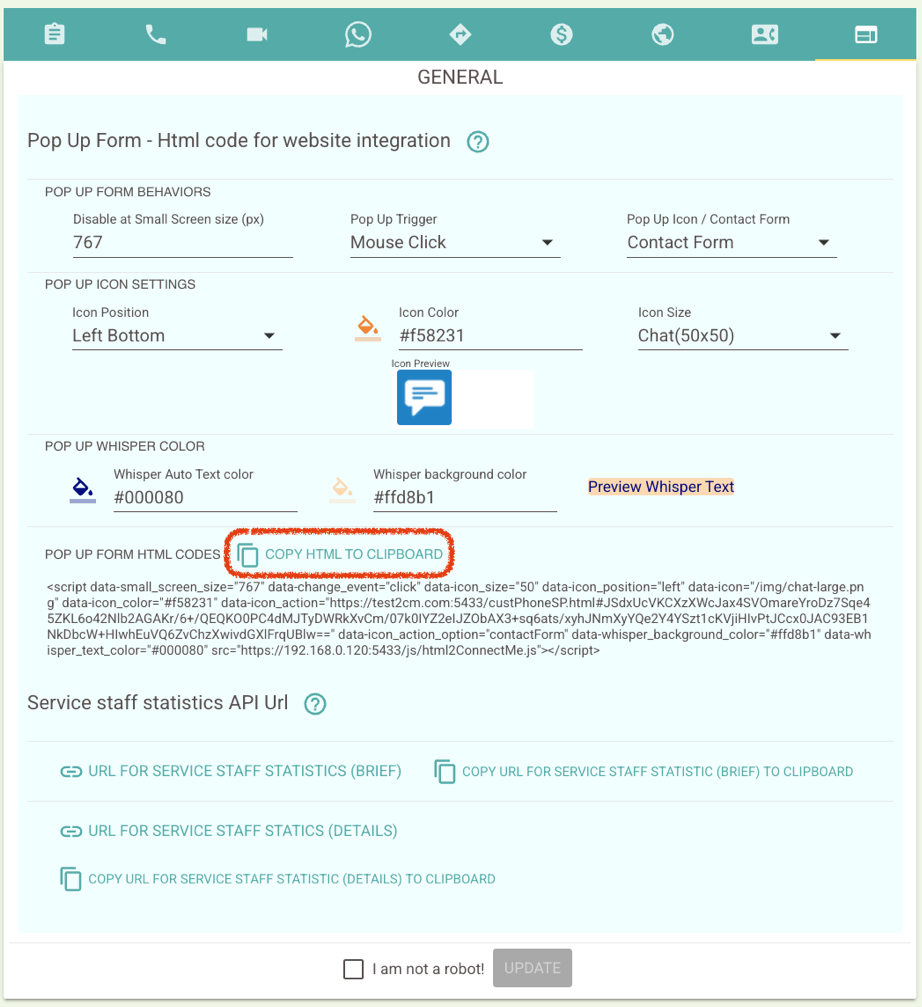
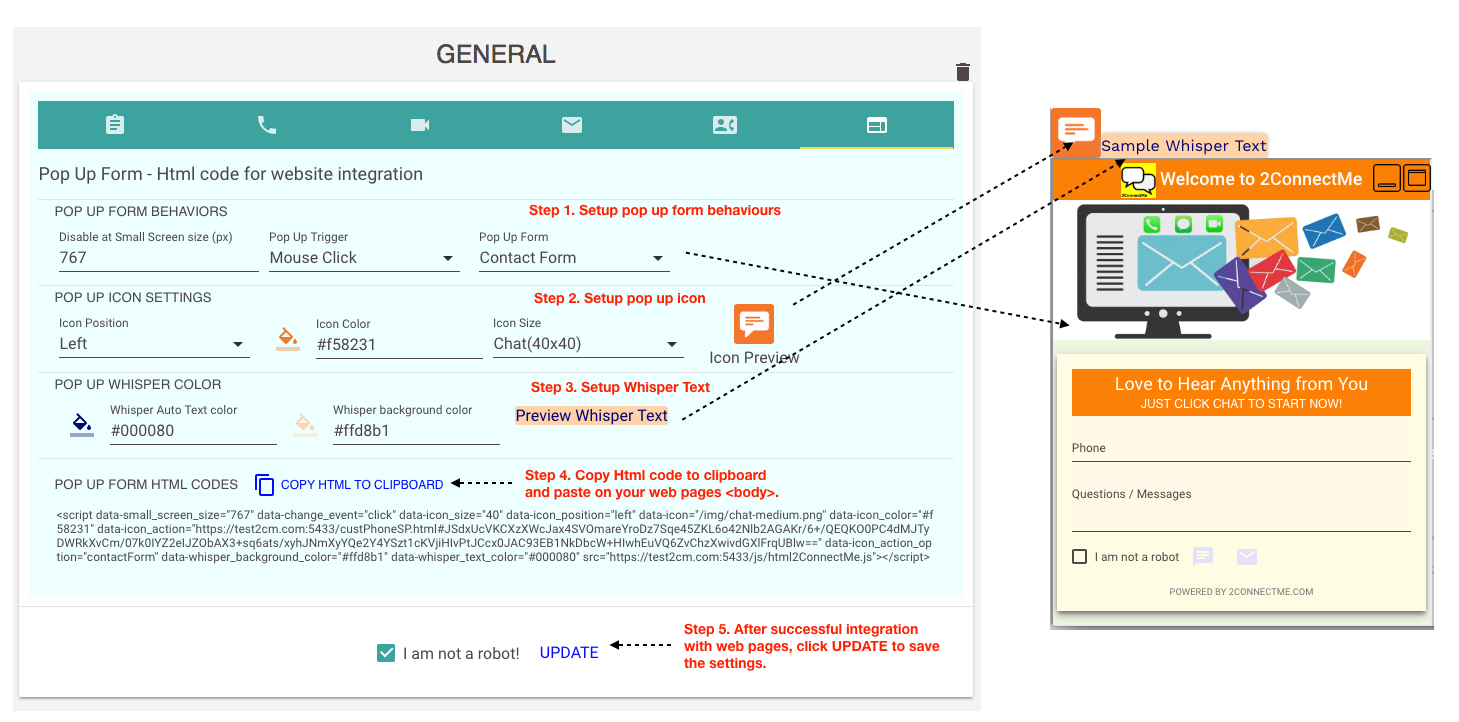
Details HTML web page integration settings documents here.
Website without WordPress
Just copy and paste such HTML codes above to embed it inside <body> tag of any normal web pages.
Website with WordPress (Without Plugin)
The sticky chat button needs only on SOME pages instead of ALL.
- Deactivate and uninstall our WordPress plugin (if activated).
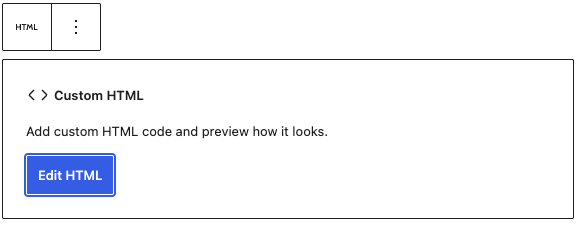
- Add “embed HTML code” Block on your webpage.
- Copy and paste the HTML codes above and Update.