StartUp or Personal Usage
Registration
- Just spend 2 minutes to register a new account with your email address. This email address will be used as user ID to logon. Therefore, every email address can be registered once only. If you do not find the registration email in your Inbox in 1 minute, please check your Junk mailbox. Sometimes, email systems wrongly treat it as a Junk mail.
Watch Video: Sign Up Free
Sign Up Forever Free Plan
Step 1: New Company Registration (Registration link here)
Step 1.1: Input your company information.
The key information is the email address to be registered. The email address will be used as administrator account to logon to 2ConnectMe. Please be alerted that once the email address is registered as administrator account, it cannot be changed later. Therefore, please be careful in selecting your email address for administrator account.
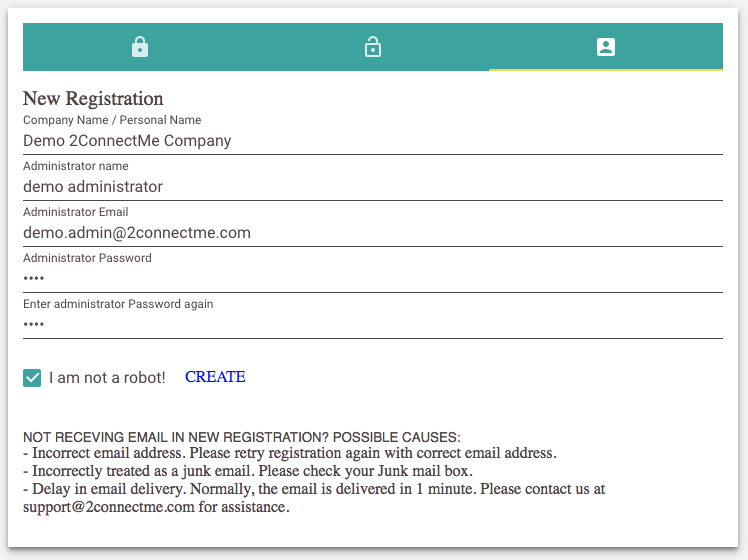
Step 1.2: Registered email address verification.
An validation email is sent to your registered email address. Just click to link to verify the address and it will divert you to agent logon screen. If you do not find the registration email in your Inbox in 1 minute, please check your Junk mailbox. Sometimes, email systems wrongly treat it as a Junk mail.
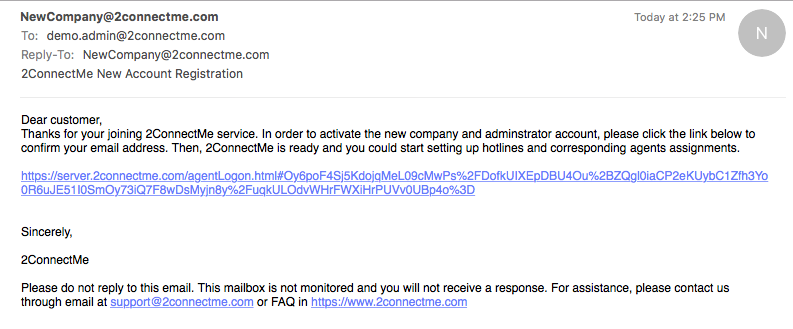
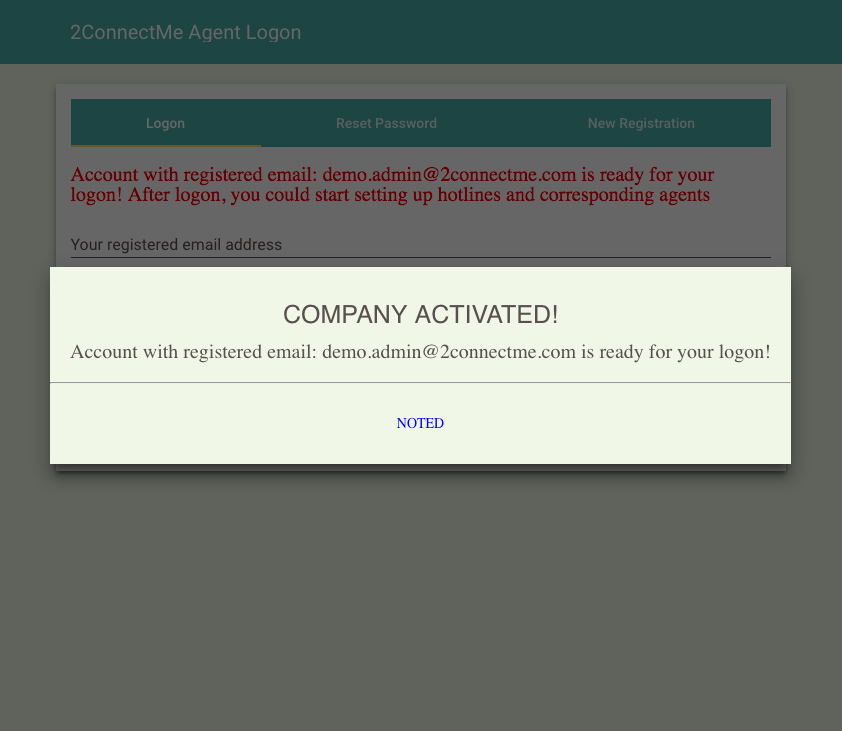
Step 1.3: Successful Company Activation.
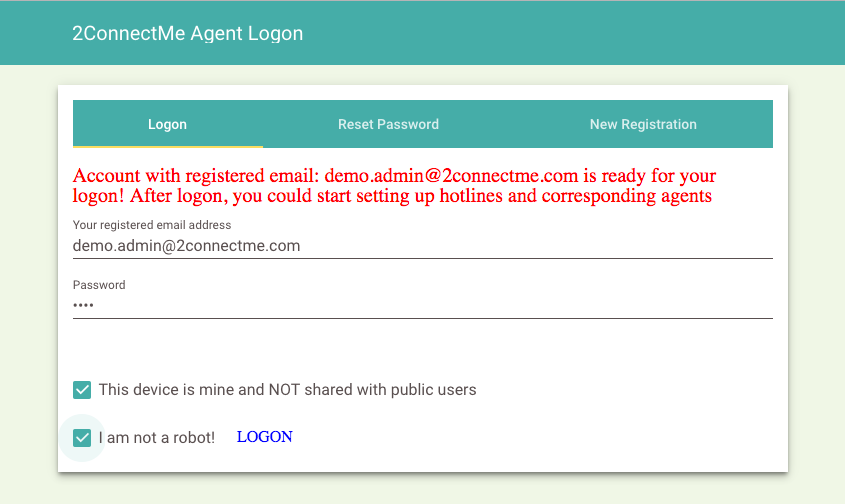
Step 1.4: First time administrator logon (Logon link here)
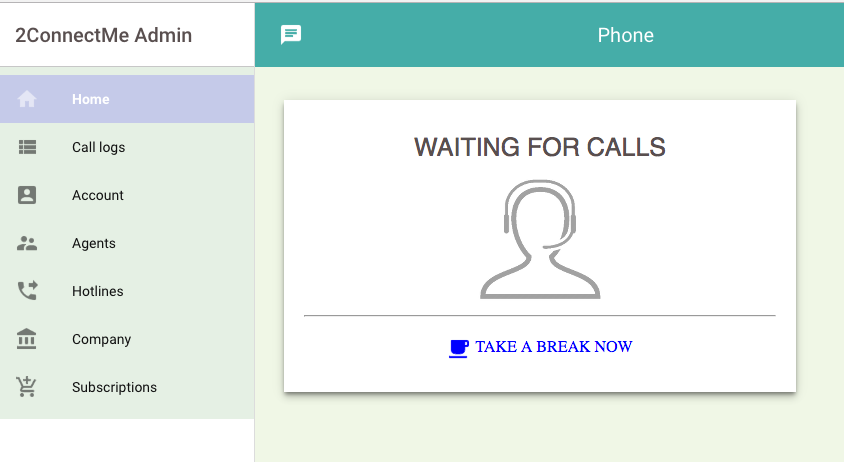
Step 1.5: Successful logon first time
- After validation of your email address, the address link of chat room named “GENERAL” for text chat (contact form), voice chat and video chat will be sent to your registered email address. If you do not find the “New Company” email in your Inbox in 1 minute, please check your Junk mailbox. Sometimes, email systems wrongly treat it as a Junk mail.
Sample Email here

Ready to serve you
- Then, you have your own chat room immediately. Using the new administrator account created, you logon either mobile Apps or through a Browser, you become ready for the calls from customers / anonymous who click the chat room address. Then, you can just paste the chat room address link to your social media, e.g. facebook, youtube, linkedln, or your own meeting request for online meeting. Immediately Working. Yes, it is like a magic!
- For example, you may check the youtube video here which we put our live chat URL at the end of video descriptions as a public contact channel.
Example extracted from Descriptions of YouTube video.
Account Profile Configuration – Customer Greeting & Agent Photo
The Account Profile is for configuring the agent information. Particularly, the following fields are important as they are shown to customer at the beginning of each chat.
- Photo Url address
- Greeting to customer
Please also take note that 2ConnectMe does not store your photo file. You may share your photo with URL from public drive, e.g. Google Drive or your photo on your Website. If this Photo Url is blank, system will base on the agent name to generate the Avatar image.
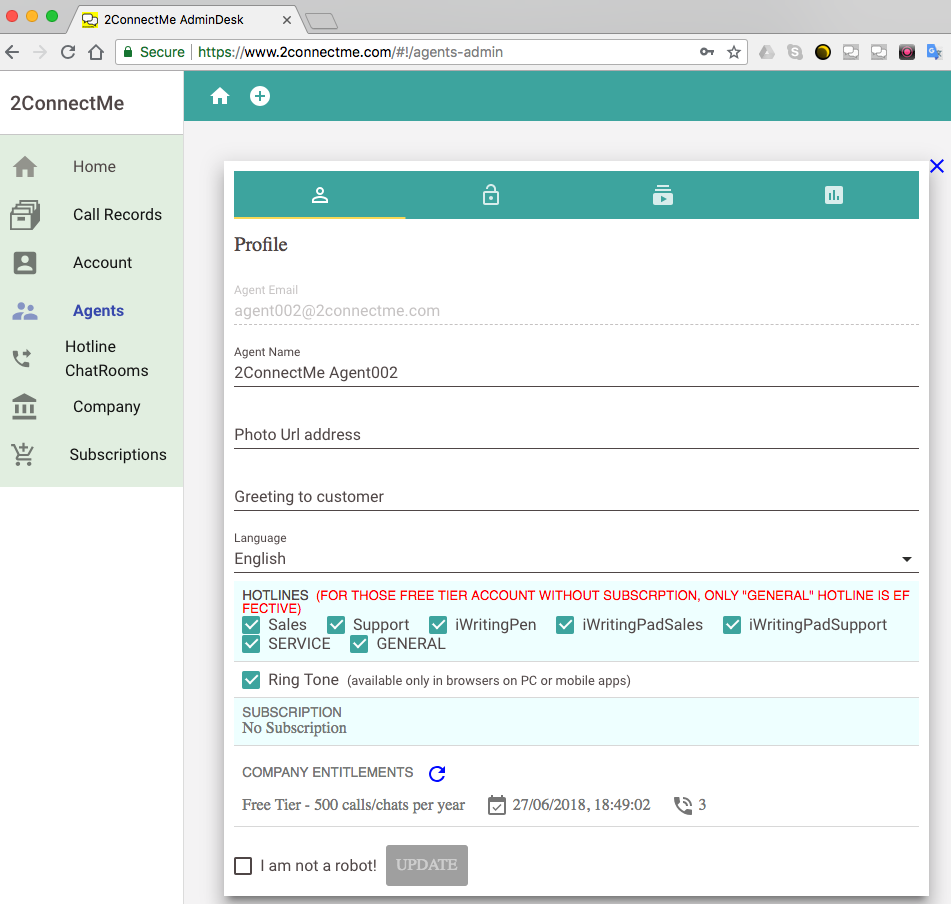
Hotlines / Chat room assignment checkbox is used to configure which hotline / chat room this agent will handle.
RingTone status. Please note that Android / iOS browsers do not allow playing ring tone due to security constraints.
The status of COMANY ENTITLEMENTS (500 chats shared by all Agents). The figure above shows 3 of 500 chats (Free Tier) Company Entitlements are connected and used.
System Customisations
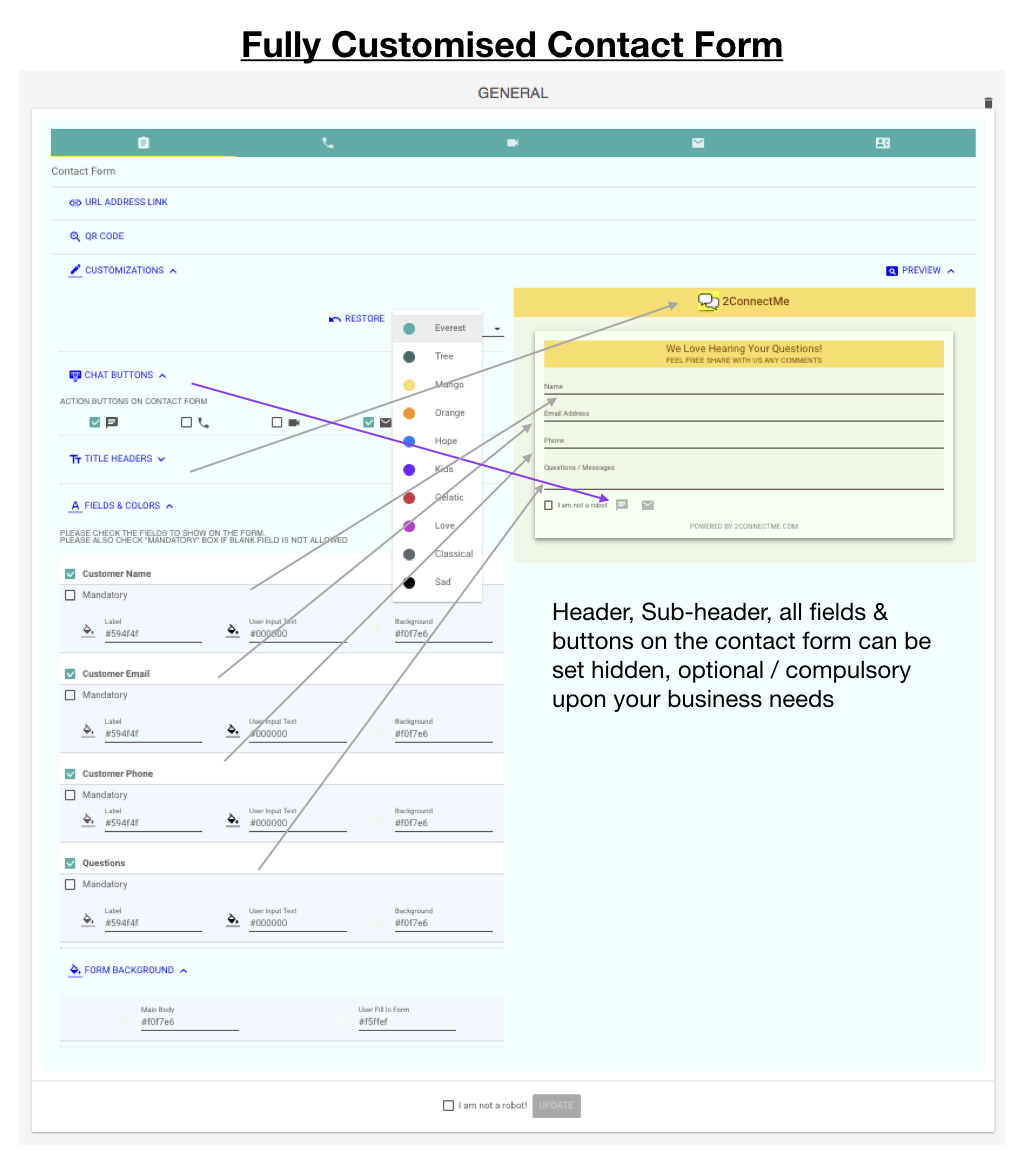
- The Contact Form can be fully customised such as color theme, optional text fields, optional call buttons for text chat, voice and video call.
Screen: Contact Form customisation

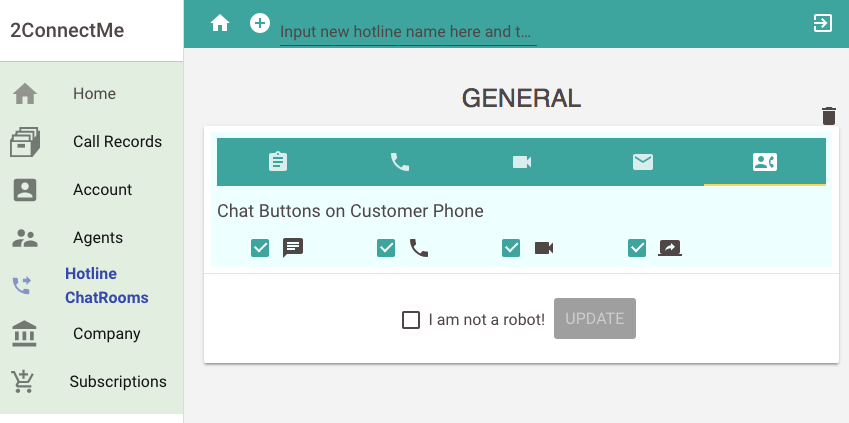
- The chat buttons on Customer Phone can be pre-configured for each of chat room.
Screen: Configure Chat buttons on Customer Phone

- Company Name customisation which is used in automatic email reply to customer when customer leaves messages. If this field is empty, the default company name at the registration will be used instead.
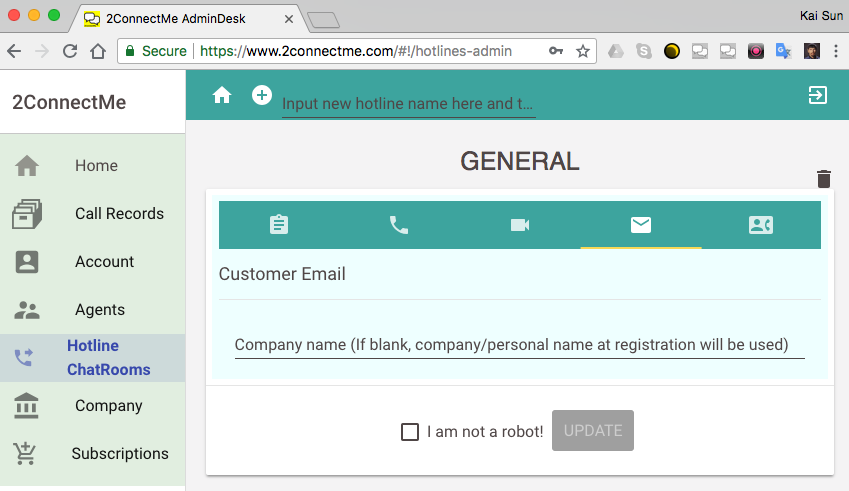
Create New Agents
- Even with your Free Tier account, you are entitled to have any number of new agents to handle 500 customer chats/calls per year. (After 500 customer connected chats / calls for a year, the 2ConnectMe account administrator ,the 1st user opening the account, is still able to handle the customer chats/calls.)
New Agent Creation
The free tier account already comes with unlimited number of agents.
The following illustrate how to add a new staff (Agent) to handle the customer from different hotlines chat rooms.
-
Go to Agents menu
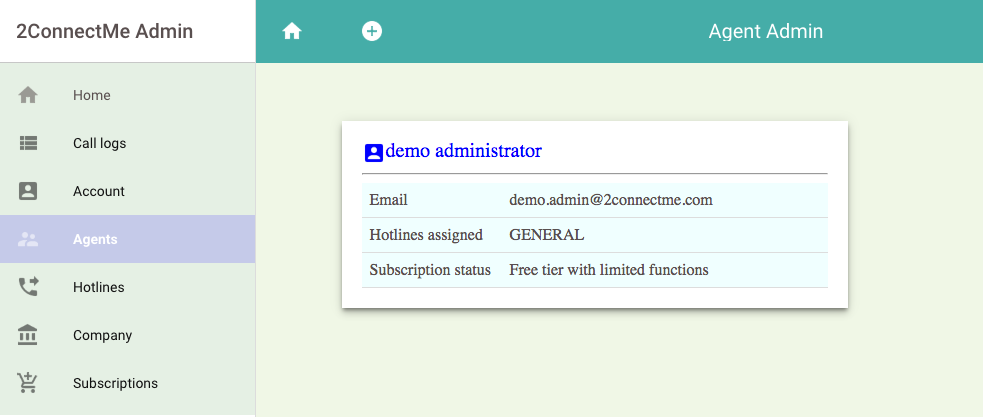
-
Press “+” button
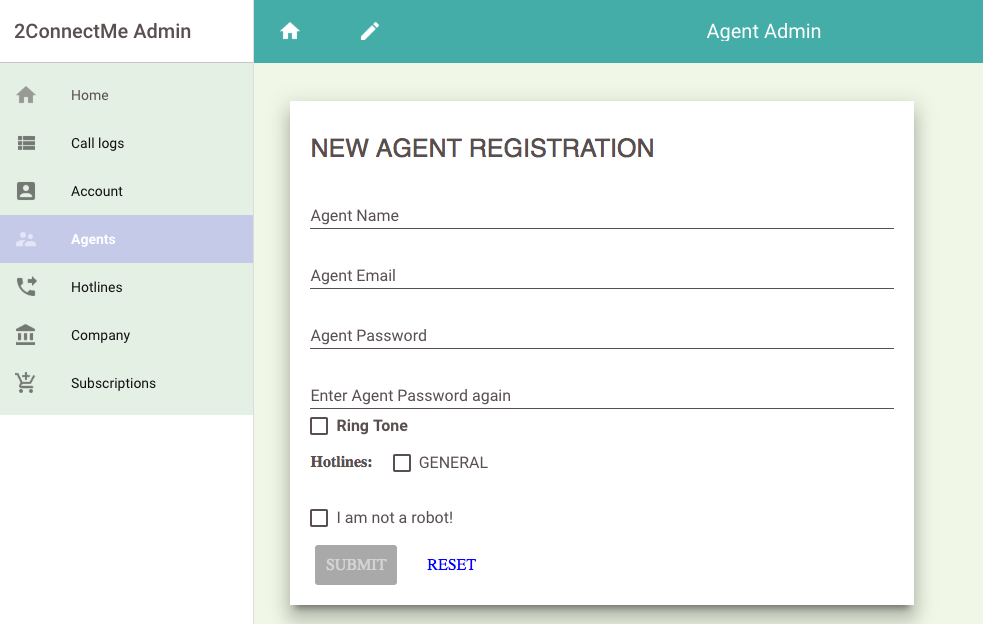
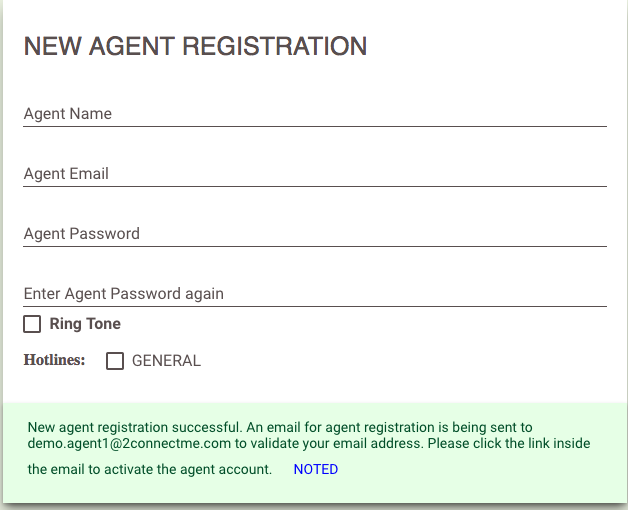
- Fill in the agent information and check the “Hotlines” which this new agent will handle.
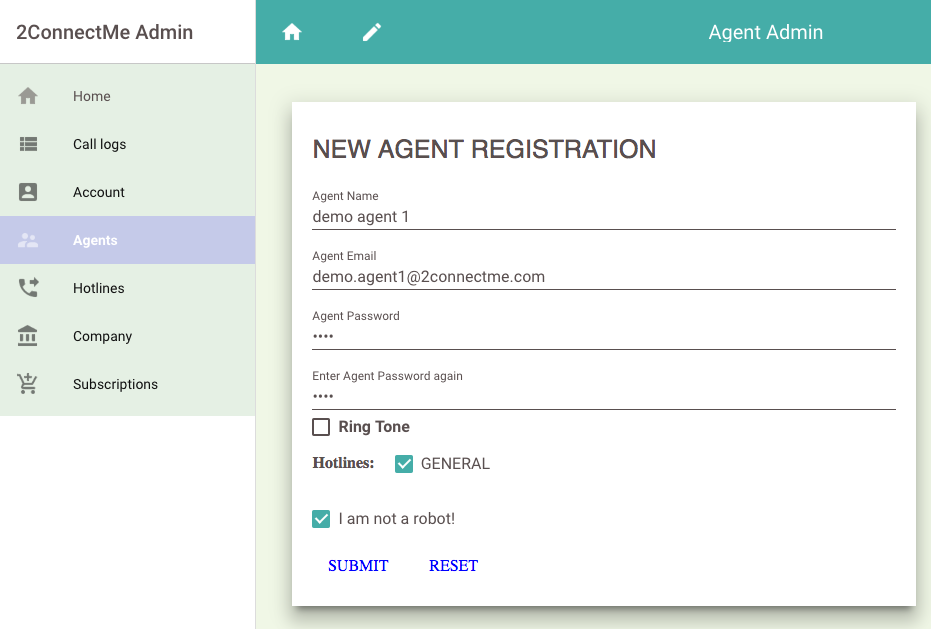
Successful New Agent Registration.
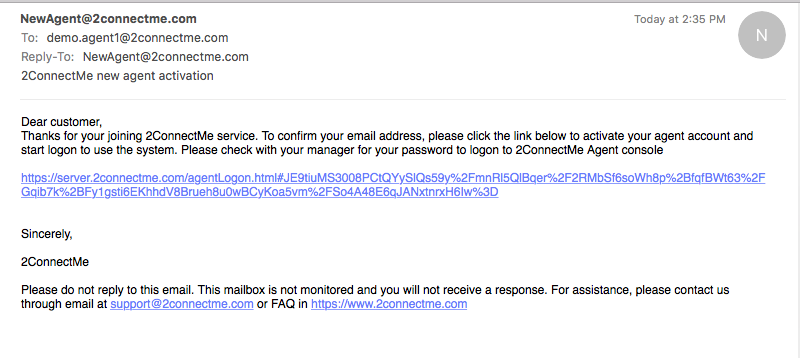
Agent registered email address verification
- An validation email is sent to your registered email address. Just click to link to verify the address and it will divert you to agent logon screen. If you do not find the “New Agent” email in your Inbox, please check your Junk mailbox. Sometimes, email systems wrongly treat it as Junk mail.
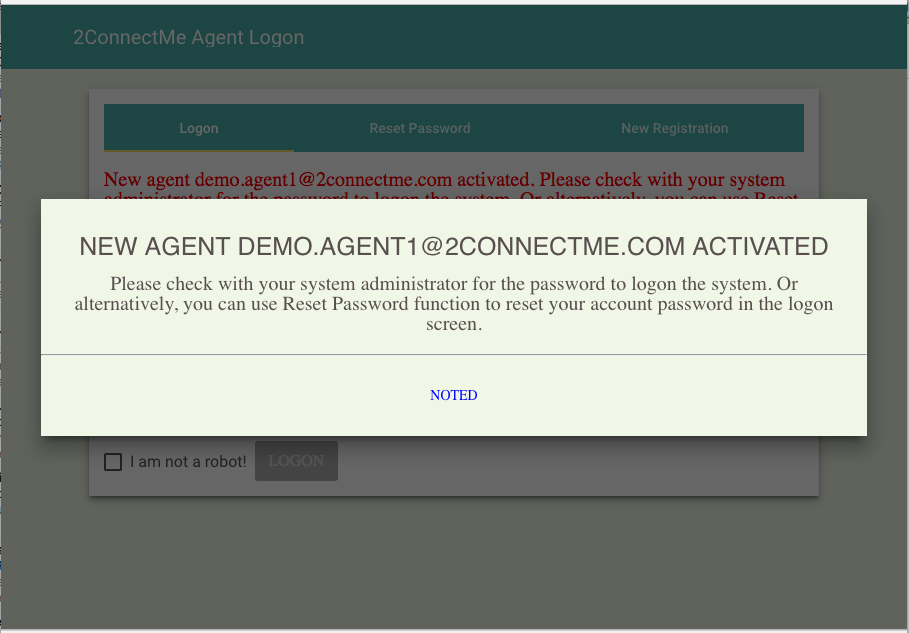
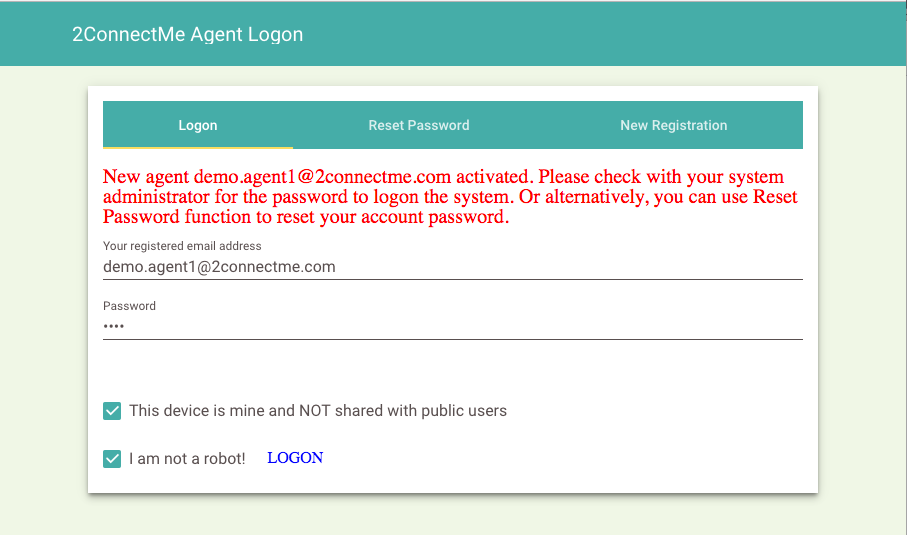
Agent Logon Screen First Time
Integration – Websites
Below we describe the two most common used integrations. The other system integration details can also be found here.
Website built on WordPress
If your website is built on WordPress, we have WordPress Plugin for PopUp contact form.
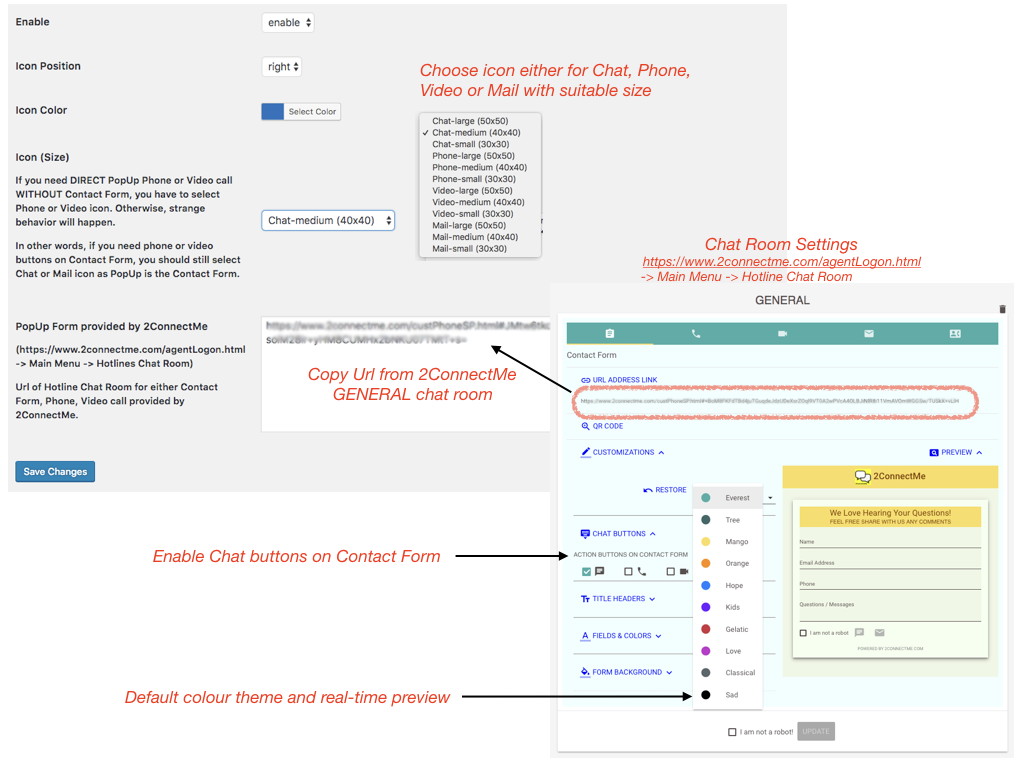
Website with Click To Call button (Also applicable to WordPress website)
If you need to create a custom “Click to Call” button on any location of website, you may
- create an image for your own, or
- find a license free icon for message , phone, video from internet, or
- any free text as you like,
put the image/icon/free text to where you like in the webpage, use ![]() (in WordPress Editor), or <a href=”…”> </a> tag for standard html code, to link such image / icon/ free text with URL of either contact form, direct phone call, or direct video call.
(in WordPress Editor), or <a href=”…”> </a> tag for standard html code, to link such image / icon/ free text with URL of either contact form, direct phone call, or direct video call.
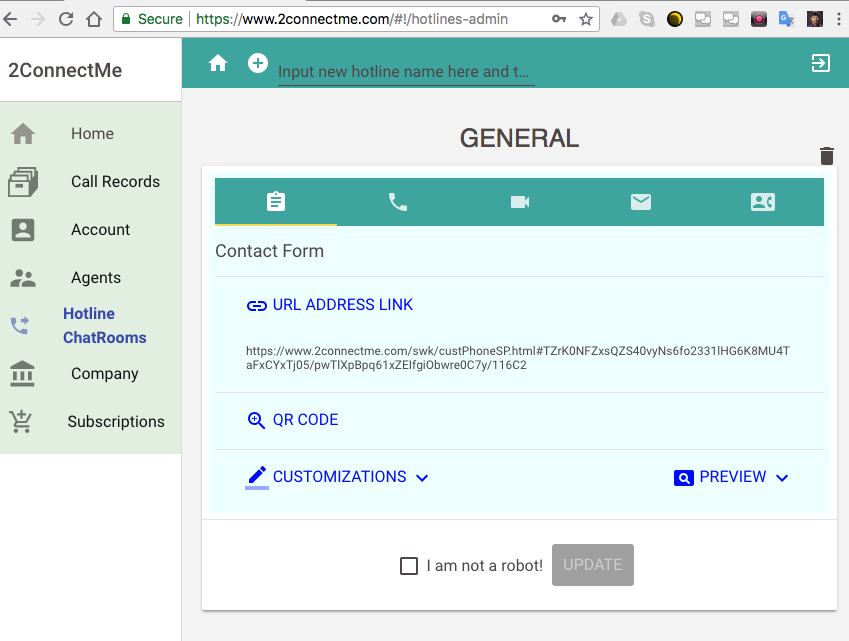
Where is Contact Form URL?
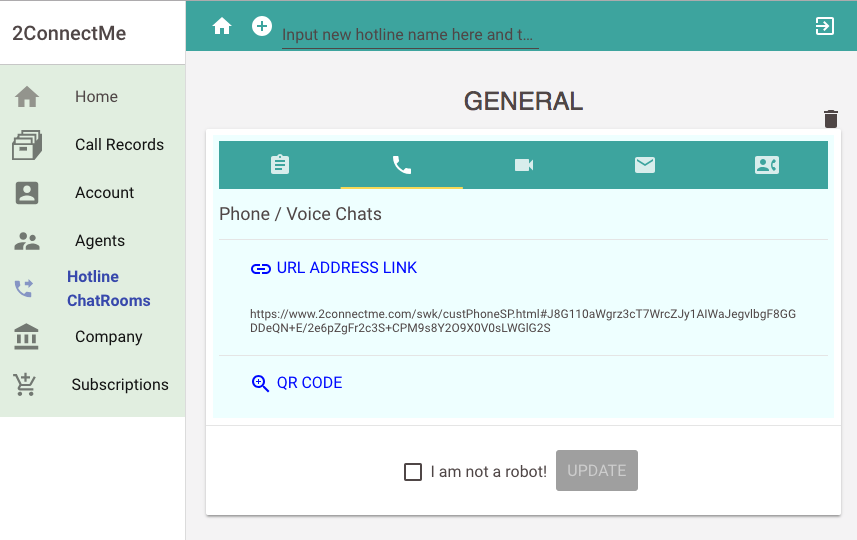
Where is direct Phone Call URL?
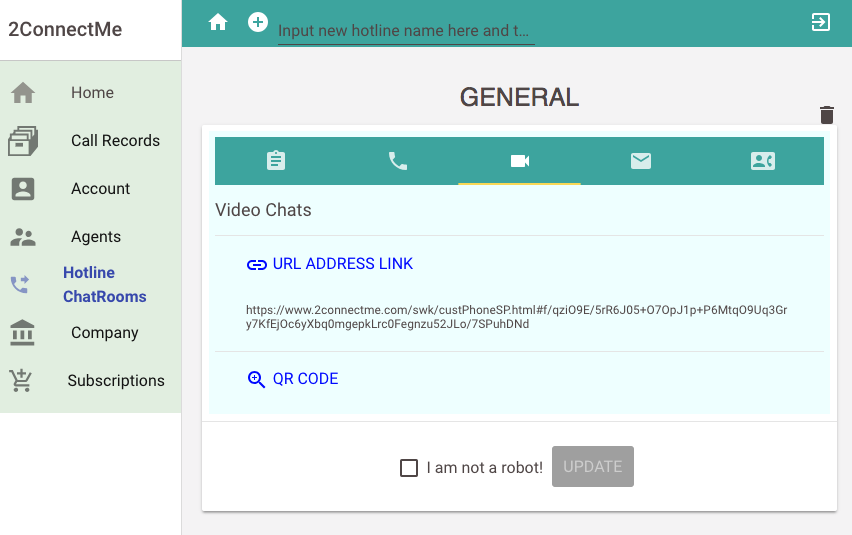
Where is direct Video Call URL?
Integration – Email Marketing Campaign
Below we describe the two most used email marketing campaigns using plan text email or MailChimp tools. The other tools can also be easily integrated by the same principle. Should you have any questions on any tools, feel free contact us.
Plain Text Email
You may just paste the URL of either Contact Form, direct Phone Call or direct Video Call in your email. Example is that 2ConnectMe send greeting email to any new account where we put URL of contact form. User can reach us to have live chat at any time.
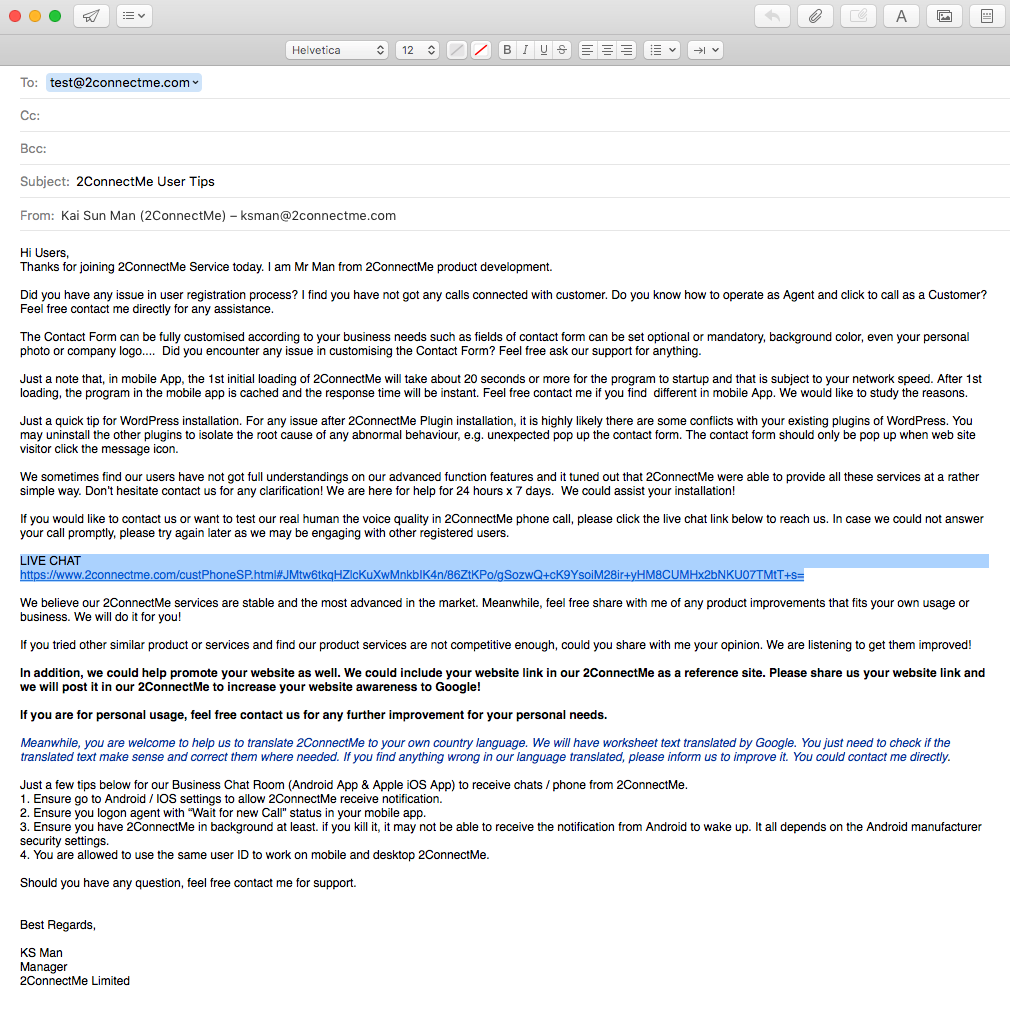
Email Text linked with Live Chat URL
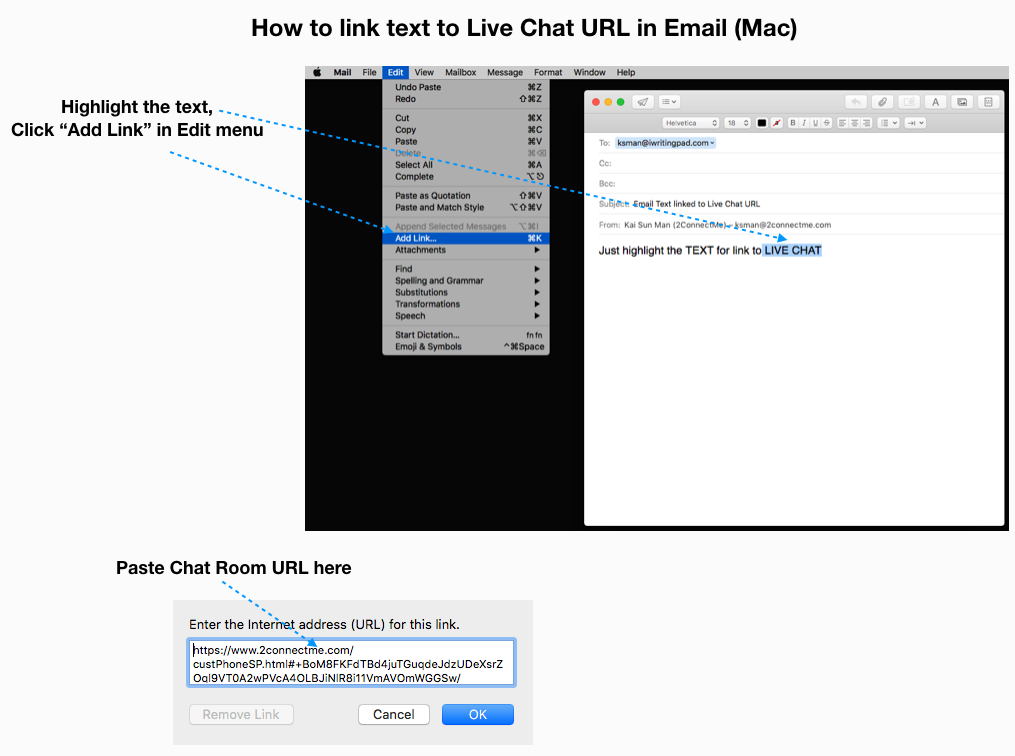
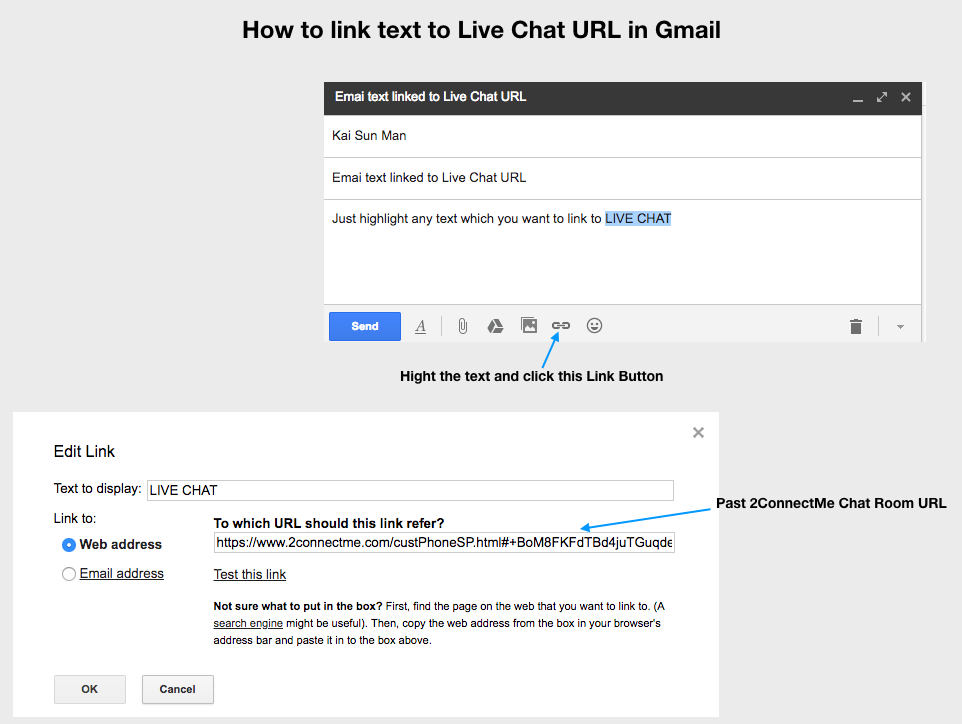
Since it is rather odd to paste URL address directly on the plain text email. It is possible to “hide” such URL address by “linking” the the text to an URL address. The following illustrate how to do that in different mail clients, .e.g. Microsoft, Mac and Gmail.
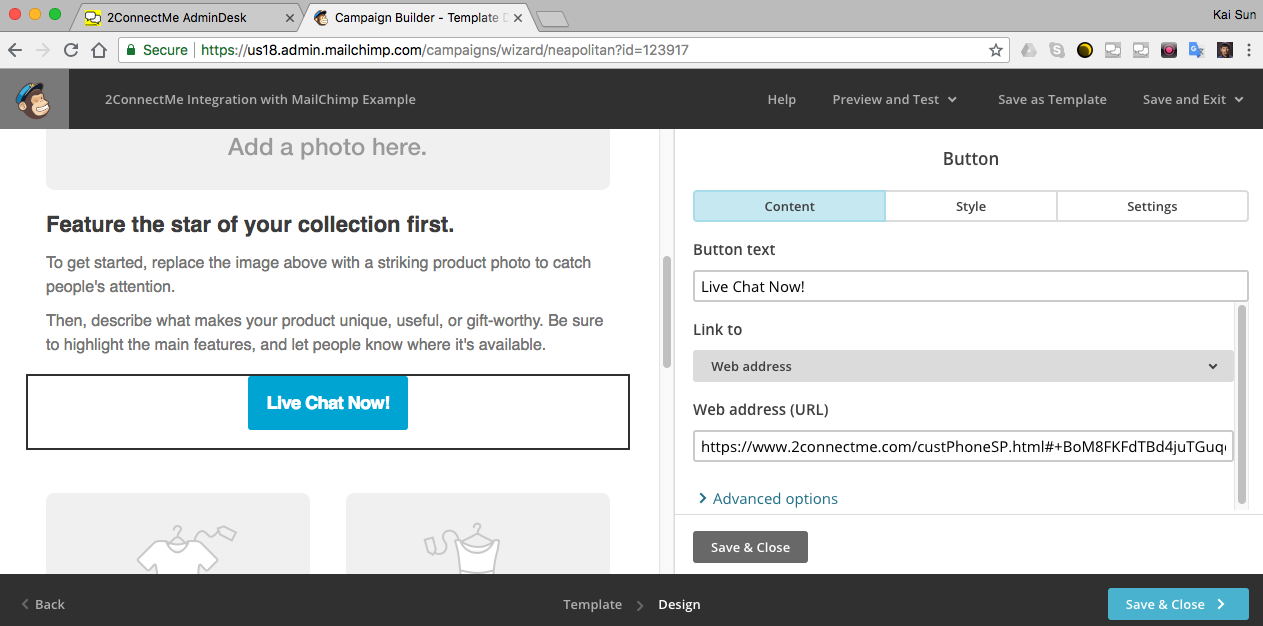
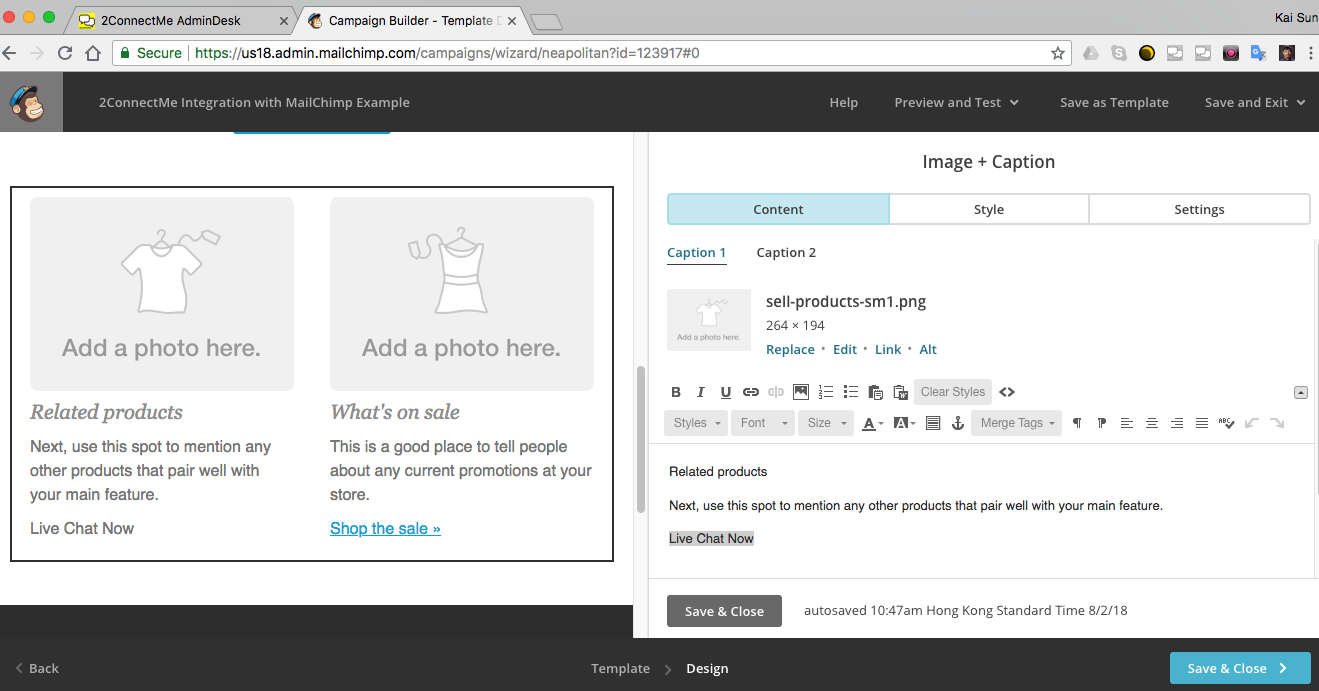
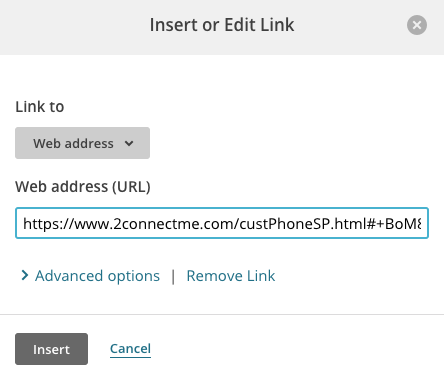
Microsoft Outlook Client Start by highlighting the text you want to link, and then: – Right-click and select Hyperlink from the menu. – Go to the Insert tab and select Hyperlink. – Press Ctrl + K. Any of those options will bring up the Insert Hyperlink window, where you can enter your Live Chat Room URL in the Address field. In the Outlook Web App, highlight the text you want to link and then click the Insert Link button () and enter the URL in the Insert link box that appears. Depending on the size of your window, you may need to click the down arrows (shown in the image below on the far right) in order to access the Insert Link button. Mail Client on Apple Mac Gmail MailChimp is one of the most common used email marketing campaign tools. The integration has never been easy before. Just paste URL address of chat room (2ConnectMe) to either action buttons or linked texts (MailChimp) as illustrated in the examples below. Create Live Chat button on MailChimp email Create plain text email with Live Chat link 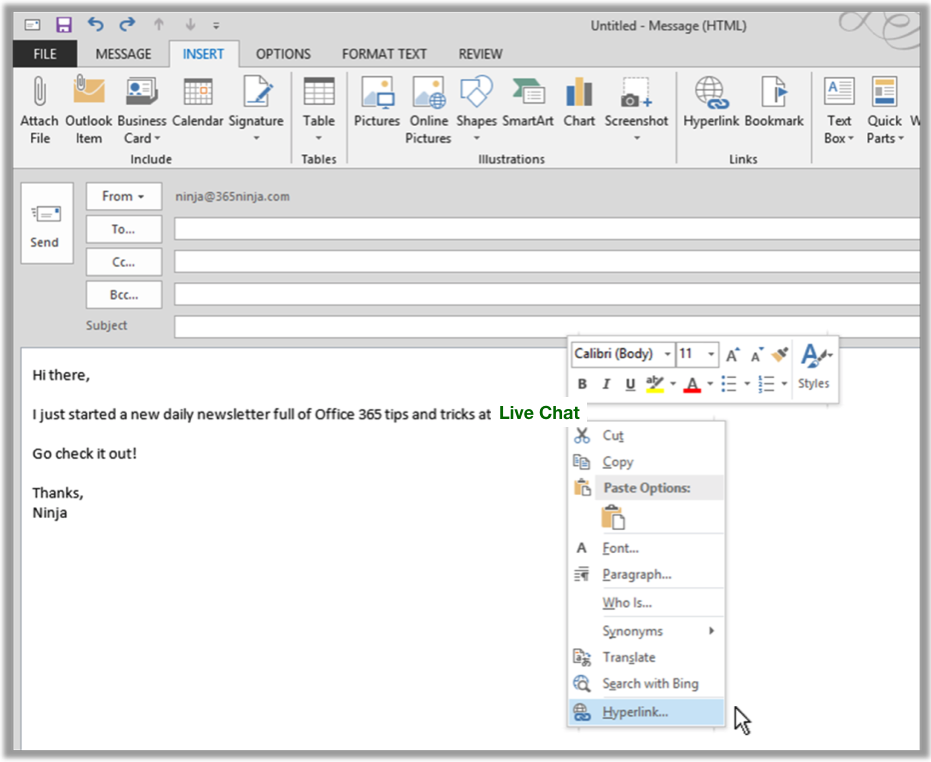


![]()
Growing Business and Large Enterprise
New Hotline / Chat Room
In order to support your growing business and higher call traffic, it is important to group the customer queries, in terms of the nature, e.g. Service, Sales, Support.., to be handled by Agents with skillsets required.
Planning
Assign New Hotline / Chat Room to Agents
Assign the agents to this new hotline / chat room so that they can be distributed with customer queries.


